A mud kitchen or sensory table is exactly what it sounds like: an outdoor play station where kids use real kitchen tools, water, soil, and whatever nature provides to cook, mix, create, and imagine. It is part sensory playground, part creative workshop, part backyard restaurant.
KEY TAKEAWAYS
- A mud kitchen is one of the simplest, most rewarding backyard projects you can build for your kids. It encourages hours of creative, screen-free outdoor play while developing motor skills, imagination, and confidence.
- You can build a mud kitchen for under $100 with basic materials and a few hours of work, or invest more for a polished setup that becomes a permanent feature of your Yardtopia.
- Southern California's year-round sunshine means a mud kitchen delivers 365 days of play value. Add water-wise plants, natural ingredients, and a shady spot, and you have an outdoor play station that practically runs itself.
For Southern California families who already live half their lives outside, a mud kitchen fits right into the way you use your yard and can be a functional and beautiful addition to your Yardtopia.
This guide covers everything you need to know: what a mud kitchen is and why kids are drawn to them, the real developmental benefits behind the messy play, how to plan and build one yourself (at any budget), and how to make it a lasting, beautiful part of your backyard ideas for kids. Whether you are starting with a stack of free pallets or building a polished cedar station, you will find your path here.
What Is a Mud Kitchen and Why Do Kids Love Them?
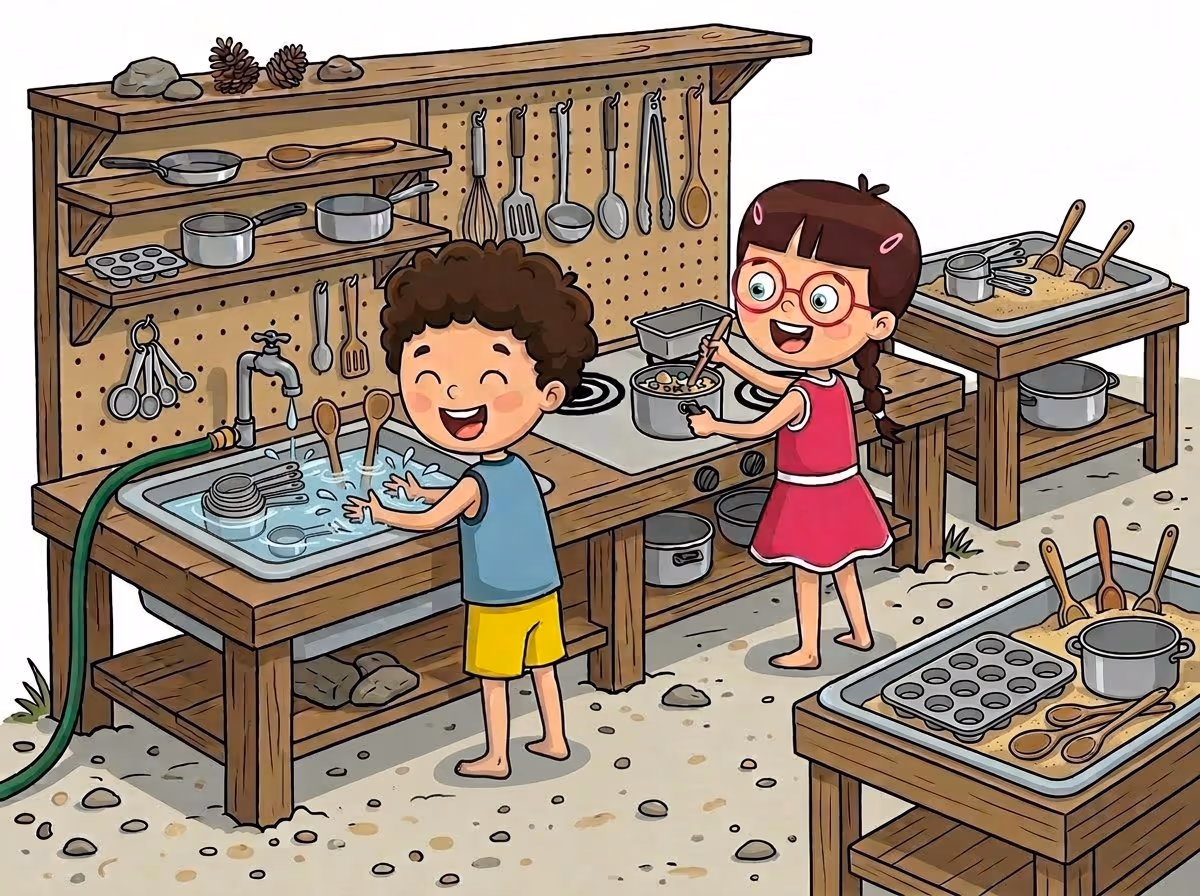
A mud kitchen is an outdoor play station where kids use real kitchen tools, natural materials, water, and soil to cook, mix, and create. There are no batteries, no screens, no instruction manuals. Just open-ended, child-led play that unfolds differently every single time.
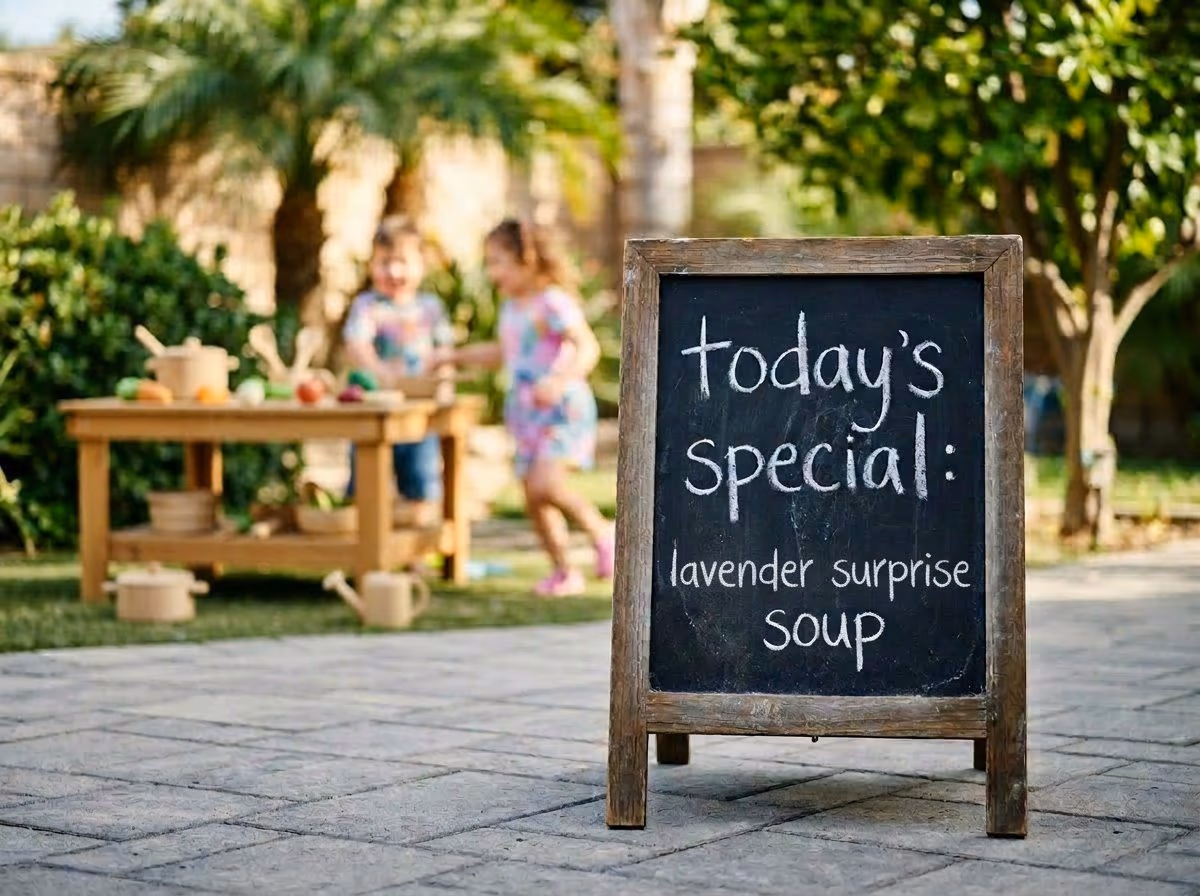
Think of it as a sandbox with a purpose. Kids scoop soil into metal pots, pour water to get the consistency just right, stir with wooden spoons, and serve their creations on old plates to an audience of stuffed animals, parents, or the family dog. One afternoon it could be a bakery. The next day it is a potion lab. The day after that it is a five-star restaurant with a chalkboard menu and a very strict head chef who insists you try the "lavender surprise soup."
What makes mud kitchens magnetic for kids is that there is no wrong way to play. A toddler can spend 30 minutes just scooping and pouring, completely absorbed in the feel of wet earth moving through a funnel. A preschooler can run an elaborate restaurant, taking orders, preparing "meals," and negotiating prices in play money. A seven-year-old can design experiments, testing what happens when you mix sand with water versus clay with water, or how many rose petals it takes to turn a mud pie pink.
The concept traces back to early childhood education settings in the UK and Scandinavia, where outdoor play has long been a cornerstone of the curriculum. Today, mud kitchens are one of the most popular backyard play features worldwide.
And the reason is simple: they keep kids engaged, outdoors, and creating for longer than almost any other play setup.
For Southern California families, the appeal multiplies. You are not building something that gets used for three months and then sits under a tarp all winter. A mud kitchen here is a year-round play station. Your kids can be outside mixing "recipes" in January just as easily as July. That is the kind of backyard feature that earns its space.
GOOD TO KNOW
Mud kitchens originated in early childhood education settings in the UK and Scandinavia, where outdoor play is a cornerstone of the curriculum. Today they are one of the most popular backyard play features worldwide, and for good reason: they keep kids engaged longer than almost any other outdoor activity.
What Are the Benefits of a Mud Kitchen for Kids?
The benefits of a mud kitchen go far beyond keeping kids busy (though it certainly does that). When children play in a mud kitchen, they are developing skills that researchers and child development specialists have studied for decades. Here is what is actually happening behind all that glorious mess.
Sensory development. Mud engages touch, smell, sight, and sound simultaneously. The cool, squelchy feeling of wet soil between fingers. The earthy smell after adding water. The sound of a wooden spoon scraping against a metal pot. These sensory experiences are not just fun. They build critical neural connections, especially in early childhood when the brain is wiring itself for how the world works. Research from Pathways.org confirms that sensory play supports cognitive growth, language development, and problem-solving skills.
Fine and gross motor skills. Every action at a mud kitchen is a motor skill workout: scooping soil into a cup, pouring water without spilling, stirring a thick mixture, carrying a heavy pot from one station to another, squeezing mud through a funnel. Kids build hand strength, coordination, and balance without realizing they are working.
Imaginative play and creativity. A mud kitchen is an empty stage. Kids decide what to make, how to make it, what the rules are, and when to change them. There is no "right" answer. A pile of mud can become a birthday cake, a volcano, a healing potion, or a pizza depending entirely on the story unfolding in a child's mind. This open-ended creative play is the kind that early childhood educators consider most valuable.
Social skills. When two or more kids share a mud kitchen, negotiation happens naturally. Who is the chef and who takes orders? How do you share the only whisk? Can you agree on a recipe? These small interactions build the foundations of cooperation, turn-taking, and communication.
Language and early math. "Add three scoops of sand, then pour the water slowly." Without meaning to, kids practice counting, measuring, sequencing, and following (or inventing) instructions. Literacy and numeracy happen in the most natural setting possible.
Immune system support. It sounds counterintuitive, but research supports it. Exposure to soil microbes helps train the developing immune system. Studies referenced by the Minnesota Children's Museum show that kids who play in dirt develop more robust immune responses than those kept in overly sanitized environments.
Emotional regulation. Messy play reduces anxiety and builds confidence. When kids are allowed to get dirty, make mistakes, and embrace imperfection, they learn that not everything needs to be neat and controlled. That is a life skill that extends well beyond the backyard.
EXPERT TIP
Child development specialists note that open-ended play, the kind where kids decide what to do and how to do it, builds executive function skills like planning, problem-solving, and self-regulation. A mud kitchen is one of the most effective backyard setups for this kind of play because there is no "right" way to use it.
How Do You Plan Your Outdoor Mud Kitchen?
Before you pick up a drill, a little planning makes the difference between a mud kitchen that gets used every day and one that ends up ignored in the wrong corner of the yard. The good news: this is not complicated. A few smart decisions upfront set you up for years of play in your Yardtopia.
Where Should You Put a Mud Kitchen in Your Yard?
Location is the single most important planning decision, especially in Southern California where sun exposure can make or break an outdoor play area.
Near a water source. Position your mud kitchen within hose reach. Kids need water for mixing, and you need it for cleanup. A garden hose connection nearby saves you from hauling buckets back and forth.
Partial shade. This is critical in SoCal. Full afternoon sun in July means a kitchen that is too hot to touch and kids who retreat inside after 20 minutes. Under a tree, alongside a shade structure, near a pergola, or against a north-facing wall gives you the balance of light and protection that extends play time dramatically.
On a surface that can handle mess. Place your mud kitchen on dirt, gravel, or decomposed granite rather than directly on a patio you want to keep clean. Mud, water, and kids are a combination that guarantees splatter.
Close enough for supervision. You want a clear sightline from the house or patio, but far enough that kids feel like they have their own territory. That sense of independence is part of what makes a mud kitchen special.
Consider drainage. A slight slope or a gravel bed underneath prevents water from pooling after enthusiastic play sessions. Standing water attracts mosquitoes and creates slippery conditions, so make sure water has somewhere to go.
What Size Should a Mud Kitchen Be?
Match the counter height to your child's age for comfortable play:
A typical footprint runs three to six feet wide and 18 to 24 inches deep. Start with what fits your space. You can always add modules later as your kids grow and as the kitchen earns more real estate in your yard.
What Features Can You Include?
Every mud kitchen needs a flat work surface. Beyond that, you can add as much or as little as you want:
GOOD TO KNOW
In Southern California, positioning your mud kitchen under existing shade, whether a tree, pergola, or shade sail, extends play time dramatically. Kids who would retreat inside after 20 minutes in full sun will play for hours in a shaded mud kitchen. Bonus: a shade structure also protects the wood from UV damage.
What Materials Do You Need to Build a Mud Kitchen?
One of the best things about a mud kitchen project is that it meets you where you are. There is no single "right" way to build one. Here are three paths, from free to polished, so you can pick the one that fits your budget and your vision.
Path 1: Pallet and Upcycle Build ($0 to $50). Reclaimed pallets, an old side table, wooden crates from the hardware store. This is the fastest route with the roughest finish, and plenty of families love it. It is ideal if you are testing the concept, renting, or just want something up by Saturday afternoon.
Path 2: Standard DIY Build ($75 to $150). Pressure-treated lumber or cedar, basic hardware, a plastic tub for the sink. This is the sweet spot for most families. It looks clean, it is sturdy, and it lasts for years with a little seasonal care.
Path 3: Premium Build ($200 to $400+). Cedar or composite materials, a real utility sink, stove grate burner rings, multiple stations. This becomes a permanent feature of your backyard, the kind of thing that looks intentional and earns compliments from the neighbors.
Materials List (Standard DIY Build)
Tools You Will Need
| Build Path | Est. Cost | Best For |
|---|---|---|
| Pallet / Upcycle | $0 to $50 | Testing the concept, renters, quick weekend project |
| Standard DIY | $75 to $150 | Most families. Durable, looks good, lasts years |
| Premium Build | $200 to $400+ | Permanent backyard feature, composite materials, real sink |
How Do You Build a DIY Mud Kitchen Step by Step?
Here is a straightforward seven-step build for a standard DIY mud kitchen. This works for the $75 to $150 range and produces a solid, good-looking kitchen that your kids will use for years. Total build time is roughly three to four hours.
Step 1: Cut Your Frame Pieces
Start by cutting all your lumber to size before assembling anything. You will need four legs cut to your desired counter height (adjust based on your child's age), front and back rails, side rails, and shelf supports.
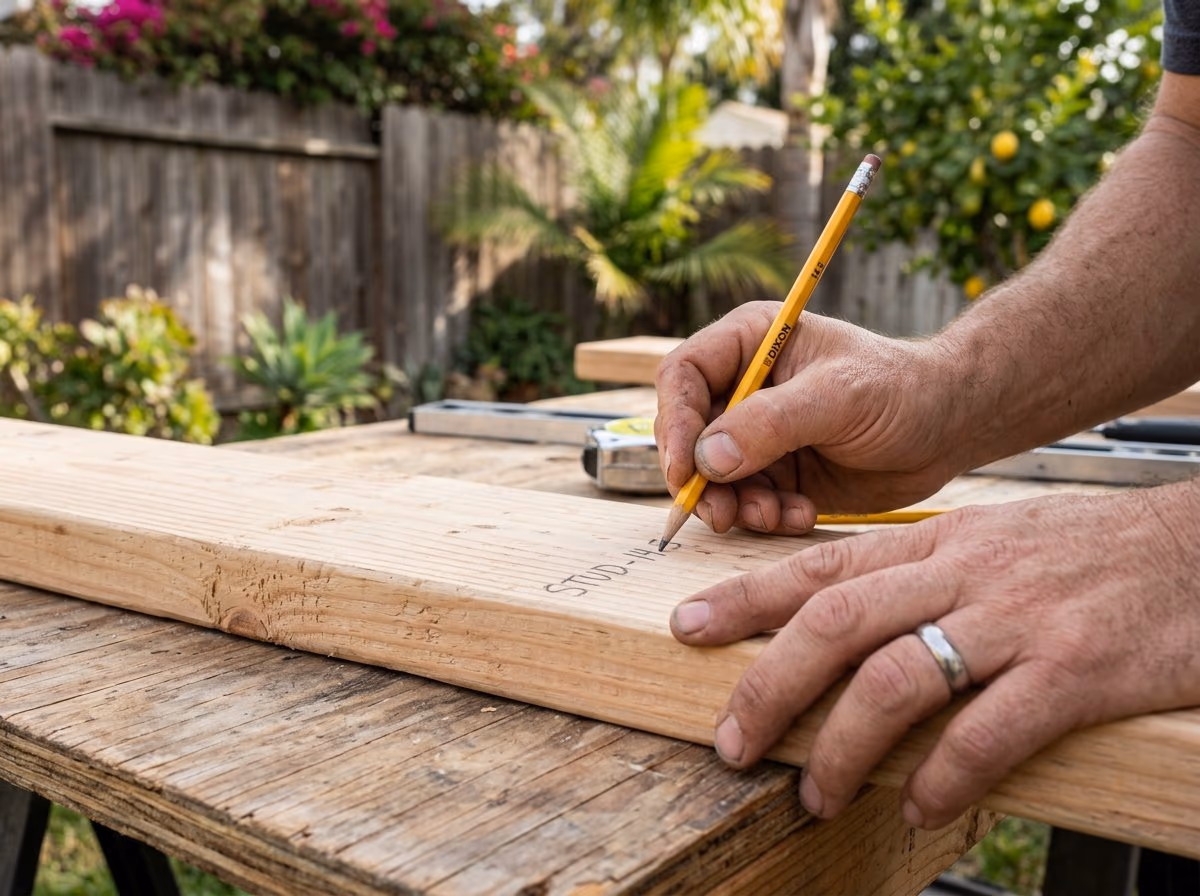
Pro tip: lay all your cut pieces out on the ground and label them with pencil. It sounds fussy, but it saves confusion during assembly and ensures everything lines up.
Step 2: Build the Base Frame
Assemble the rectangular base frame using exterior-grade screws. Pre-drill your holes to prevent the wood from splitting, especially near the ends of boards. Attach legs to each corner of the frame. Use a speed square to check that everything is sitting at right angles before tightening all the way down.
Step 3: Add the Counter Support and Shelf
Attach cross-supports running front to back for the countertop to rest on. Below, install a lower shelf for storage. This is where pots, pans, and "ingredient" bins will live. If space allows, a middle shelf adds extra workspace that kids love.
Step 4: Install the Countertop
Secure your countertop boards across the top of the frame. If you are including a sink basin, trace the outline of your tub or bin on the countertop and cut the hole with a jigsaw. The basin should drop in snugly but still be removable for cleaning.
Sand every edge of the countertop smooth. This step is not optional. Kids will be leaning on this surface, running their hands along it, and bumping into corners. Take the time here.
Step 5: Add the Sink Basin
Drop your plastic tub or utility sink into the countertop hole. If you want a working faucet (and kids absolutely love a working faucet), attach a garden hose adapter to the back panel or side post. Route the hose connection so it is tidy but easy to disconnect when not in use.
Make sure the basin lifts out for cleaning. Mud accumulates fast, and a removable basin saves you from wrestling with a scrub brush in an awkward position.
Step 6: Add the Backsplash and Finishing Touches
Attach a vertical back panel. This serves double duty: it stiffens the whole structure and gives you a canvas for chalkboard paint (paint it now, before mounting, and you will thank yourself later). Add hooks along the backsplash for hanging utensils, ladles, and whisks.
For the stovetop effect, you have two options. Paint circles directly on the countertop surface with heat-resistant paint, or attach salvaged stove grate rings for a more realistic look. Kids love turning the "burners" on and off.
Step 7: Weatherproof and Finish
Sand the entire surface one final time with 120-grit sandpaper. Apply a non-toxic exterior wood stain or paint in whatever color fits your backyard (natural cedar tones blend beautifully with a SoCal landscape). Seal with a water-based polyurethane for extended life.
Let everything dry completely, 24 to 48 hours, before play. We know the waiting is hard. It is worth it.
GOOD TO KNOW
Always sand every surface and edge smooth before letting kids play. Splinters are the most common mud kitchen injury. Use non-toxic, water-based stains and finishes only. Pressure-treated lumber is fine for the frame, but use untreated or naturally rot-resistant wood (like cedar) for the countertop where kids will touch most.
What Are the Best Mud Kitchen Ideas and Design Inspirations?
Once you see how many directions a mud kitchen can go, you will find the one that fits your yard, your kids, and your style. Here are seven of our favorite approaches.
1. The Pallet Mud Kitchen. Stack two pallets vertically, add a plywood countertop across the top. Done in an afternoon for nearly free. It has a rustic, resourceful look that kids adore, and you can upgrade or replace it without guilt.
2. The IKEA Hack Kitchen. Repurpose an IKEA outdoor shelf unit (the HYLLIS is a popular choice) as the base frame. Add a countertop, bolt a basin in, and you have a surprisingly polished mud kitchen without cutting a single board.
3. The Garden Station Combo. Build a mud kitchen on one side and a planting station on the other. Kids grow herbs they can use as "ingredients," bridging messy play and actual gardening.
4. The Cafe Setup. Add a chalkboard menu board, an order pad, a serving window cut into the backsplash, and play money. Full restaurant roleplay, complete with demanding customers (you) and a chef who insists the mud soup is "the best in California."
5. The Nature Kitchen. Skip the built structure entirely. Use tree stumps as counters, flat rocks as stovetops, and fallen logs as shelving. This works beautifully in natural, unstructured yard areas and costs absolutely nothing.
6. The Multi-Station Build. Separate prep area, cooking area, and wash station. Perfect for siblings or playdates where everyone needs their own workspace. This is the premium route and it looks impressive.
7. The SoCal Water-Wise Kitchen. Here is Yardtopia's signature twist. Incorporate drought-tolerant plants alongside the kitchen as a living ingredient garden. Rosemary, lavender, sage, and nasturtiums grow within arm's reach. Kids harvest their own "ingredients" and learn about native plants without a lesson plan. Use reclaimed water for play when possible.
PRO TIP
Growing herbs and California native plants alongside your mud kitchen gives kids a living ingredient garden. Rosemary, lavender, sage, and nasturtiums are all drought-tolerant, safe for kids to handle, and perfect for "recipes." It is a small addition that turns a play kitchen into a sensory learning station.
What Accessories and Supplies Does a Mud Kitchen Need?
A mud kitchen is only as good as what you stock it with. The great news: you probably already own most of what you need, and the rest costs next to nothing.
Essential tools. Metal pots and pans (not plastic), wooden spoons, a ladle, a whisk, a colander, a muffin tin, mixing bowls, measuring cups, and a funnel. Real kitchen tools are more durable, more satisfying in little hands, and teach kids to handle actual equipment with care.
Natural ingredients. Soil, sand, pebbles, gravel, water, leaves, flower petals, pine needles, seed pods, and bark pieces. Nature provides an endless pantry, and foraging for ingredients is half the fun.
SoCal bonus ingredients. This is where your yard becomes the play kitchen's pantry. Dried lavender, rosemary sprigs, citrus peels, bougainvillea petals, sage leaves, and eucalyptus pods all grow abundantly in Southern California. They smell incredible, they are safe for kids to handle, and they make every "recipe" feel special.
Creative add-ons. Laminated recipe cards (or chalkboard recipe slates), a menu board, aprons, chef hats, play money, and order pads turn a mud kitchen into a full imaginative world. These small touches are what make kids return to the kitchen day after day.
Storage. Labeled bins or jars for different "ingredients," hooks for utensils, shelves within arm's reach. Organization is not just for looks. When kids can see and reach their supplies, they play independently and for longer stretches.
GOOD TO KNOW
Skip the plastic toy kitchen sets. Real metal pots, wooden spoons, and thrift store utensils last longer, feel more satisfying in little hands, and teach kids to handle real tools with care. A $10 thrift store haul will stock an entire mud kitchen.
How Do You Keep a Mud Kitchen Safe for Toddlers and Young Kids?
A mud kitchen is a wonderfully safe play environment with a few common-sense precautions. Here is what to keep in mind, especially if you have toddlers or very young children joining the fun.
Sand all surfaces smooth and check regularly. Wood weathers over time, and what was smooth in month one can develop rough spots or small splinters by month six. A quick hand-check every few weeks catches issues before little fingers do.
Use non-toxic stains and finishes only. Kids will touch every surface, and younger ones may put their hands near their mouths. Water-based, non-toxic products are the only option.
Ensure stability. A mud kitchen should not wobble or tip. If your build feels at all unsteady, anchor it to a fence or wall with L-brackets. A structure at counter height naturally discourages climbing, but make sure it can handle a child leaning their full weight against it.
Supervise water play. This is essential. Even a shallow sink basin presents a drowning risk for children under three. Drain the basin after each play session, and always have an adult nearby when water is involved.
Choose age-appropriate ingredients. Toddlers under three should use larger "ingredients" (big stones, large leaves, chunky bark) to avoid choking hazards. Save the small pebbles and seed pods for older kids.
Inspect for pests regularly. Black widows and other spiders are present in Southern California and like to shelter in dark corners. Check the underside of shelves and the backsplash area, especially if the kitchen sits near a fence or garden wall.
Sun protection. Apply sunscreen before play, ensure the mud kitchen is in shade, and keep water bottles nearby. SoCal sun is part of what makes year-round play possible, but it needs respect. For more on creating safe outdoor play areas, see our guide to playground safety and ground cover.
GOOD TO KNOW
Always supervise toddlers around water play. Even a shallow sink basin presents a drowning risk for children under three. Drain the basin after each play session, and never leave standing water unattended. For very young children, use damp soil instead of water for mess-making.
How Do You Weatherproof a Mud Kitchen for Year-Round Play?
In most of the country, a mud kitchen is a spring-through-fall project. In Southern California, it is a 365-day play station. But that year-round exposure means you need to think about protection, and in SoCal, the concern is not rain or snow. It is sun.
UV damage is your primary opponent. Constant sun exposure fades finishes, dries out wood, and breaks down lesser sealants faster than moisture ever could. Choose a UV-resistant exterior finish and reapply it annually. Cedar and redwood are naturally rot-resistant and hold up beautifully in our climate, making them ideal choices for any outdoor build.
Drainage matters. Make sure your sink basin drains freely. Drill a small hole in the bottom connected to a gravel bed or catch bucket below. Standing water after play sessions attracts mosquitoes and accelerates wood decay around the basin.
A simple cover extends life significantly. A fitted tarp or canvas cover thrown over the kitchen when it is not in use protects against UV exposure during the long stretches between play sessions. It takes 30 seconds and adds years.
Use the right hardware. Stainless steel or galvanized screws and brackets only. Standard steel hardware rusts quickly outdoors, and rusty screws compromise both structure and safety.
Schedule a spring refresh. A light sanding and re-stain once a year keeps your mud kitchen looking good and performing well. Make it a spring tradition. Put on some music, hand the kids a brush, and let them help. Thirty minutes of care buys another full year of play.
PRO TIP
In Southern California, sun damage causes more wear than rain. Use a UV-resistant exterior finish and position your mud kitchen in partial shade if possible. A light sand and re-stain each spring takes about 30 minutes and adds years to the kitchen's life. Think of it like the outdoor furniture version of changing your air filter: quick, easy, and worth it.
Mud Kitchen Play Ideas and Activities
Once the mud kitchen is built and stocked, kids take over. But if you want to spark new directions or keep the excitement fresh across seasons, here are eight play ideas that Southern California families love.
Mud pie bakery. The classic. Use muffin tins as baking molds, press cookie cutters into flat mud "dough," and decorate with petals, leaves, and seeds. Serve on plates with a full bakery ceremony.
Potion lab. Mix water, flower petals, herbs, and soil into "potions" with different colors, textures, and (sometimes questionable) smells. Add food coloring if you want to go full wizard mode. This is a favorite with the four-to-seven crowd.
Restaurant roleplay. Take orders on a notepad, prepare "meals" to spec, serve to family members at a nearby table, and collect play money. Add a chalkboard menu and a "closed" sign for when the chef needs a break.
Mud painting. Mix soil with water to different consistencies and "paint" on paper, cardboard, rocks, or the kitchen itself. Different soil types produce different colors, which becomes its own science lesson.
Nature soup. Forage the yard for ingredients: leaves, flowers, bark, pebbles, twigs, seed pods. Create a signature recipe. Name it. Write it on the menu board. Defend it against critics.
Sensory science. Experiment with wet versus dry soil, sand versus mud, warm water versus cold water. What happens when you freeze mud? What happens when you add sand to water? This is early science disguised as play.
Seasonal SoCal play. Spring wildflower "recipes" with California poppies and lupines. Summer creations with ice cubes melting into mud. Fall leaf "pies" decorated with crunchy sycamore leaves. Winter "hot cocoa" mud stirred with cinnamon sticks. Year-round play is one of the best perks of building a mud kitchen here.
The Yardtopia twist. Use citrus peels from your backyard tree, bougainvillea petals from the fence line, rosemary from the herb bed, and lavender from the front walkway as signature ingredients. When kids use plants from their own yard, they start paying attention to what grows there. That connection to their landscape is exactly what your Yardtopia is about. For more outdoor activity ideas, explore our guide to backyard games for kids and natural playground ideas.
"Just start, make that first mark and start generating ideas. Write down what you're thinking, and if you ever get brain fog or designer's block, you can always walk away and come back to it."
— Jonathan Stalvey, Design Principal, TerraWorks Studio
Frequently Asked Questions About Mud Kitchens
What age is a mud kitchen suitable for?
Mud kitchens work for children from about 18 months through age eight and beyond. Toddlers enjoy simple scooping and pouring with close supervision. Preschoolers run full "restaurants" with elaborate menus. School-age kids design experiments and complex recipes. Adjust the counter height and complexity of accessories to match your child's age and abilities, and the same kitchen grows with them for years.
How much does it cost to build a mud kitchen?
A basic pallet mud kitchen costs as little as $0 to $50 using reclaimed materials. A standard DIY build with new lumber runs $75 to $150. A premium build with cedar, a real sink, and composite materials can reach $200 to $400 or more. Most families find the $75 to $150 range hits the sweet spot of durability, good looks, and value.
What do you put in a mud kitchen?
Stock it with real kitchen tools (metal pots, wooden spoons, measuring cups, muffin tins) rather than plastic toys. Add natural ingredients: soil, sand, pebbles, water, leaves, flower petals, and herbs. In Southern California, dried lavender, rosemary, sage, and citrus peels make excellent year-round "pantry items" that smell wonderful and grow right in your yard.
Can you make a mud kitchen from pallets?
Yes. Pallet mud kitchens are one of the most popular DIY approaches. Stack two pallets vertically, add a flat board across the top as a countertop, and you have a functional kitchen in under an hour. Sand all surfaces thoroughly to prevent splinters, and check that the pallets are heat-treated (stamped HT), not chemically treated. Heat-treated pallets are safe for play; chemically treated ones are not.
Are mud kitchens safe for toddlers?
Mud kitchens are safe for toddlers with appropriate supervision. Sand all surfaces smooth, use non-toxic finishes, choose larger "ingredients" to avoid choking hazards, and always supervise water play. Ensure the structure is stable and cannot tip. Many families start toddlers with just a low basin of damp soil and a few spoons before graduating to a full kitchen.
Do you need to waterproof a mud kitchen?
Weatherproofing extends a mud kitchen's life significantly. Apply a non-toxic exterior wood stain or paint, use exterior-grade hardware, and consider a cover for when it is not in use. In Southern California, UV protection matters more than waterproofing. Cedar and redwood are naturally rot-resistant and excellent material choices for any outdoor build.