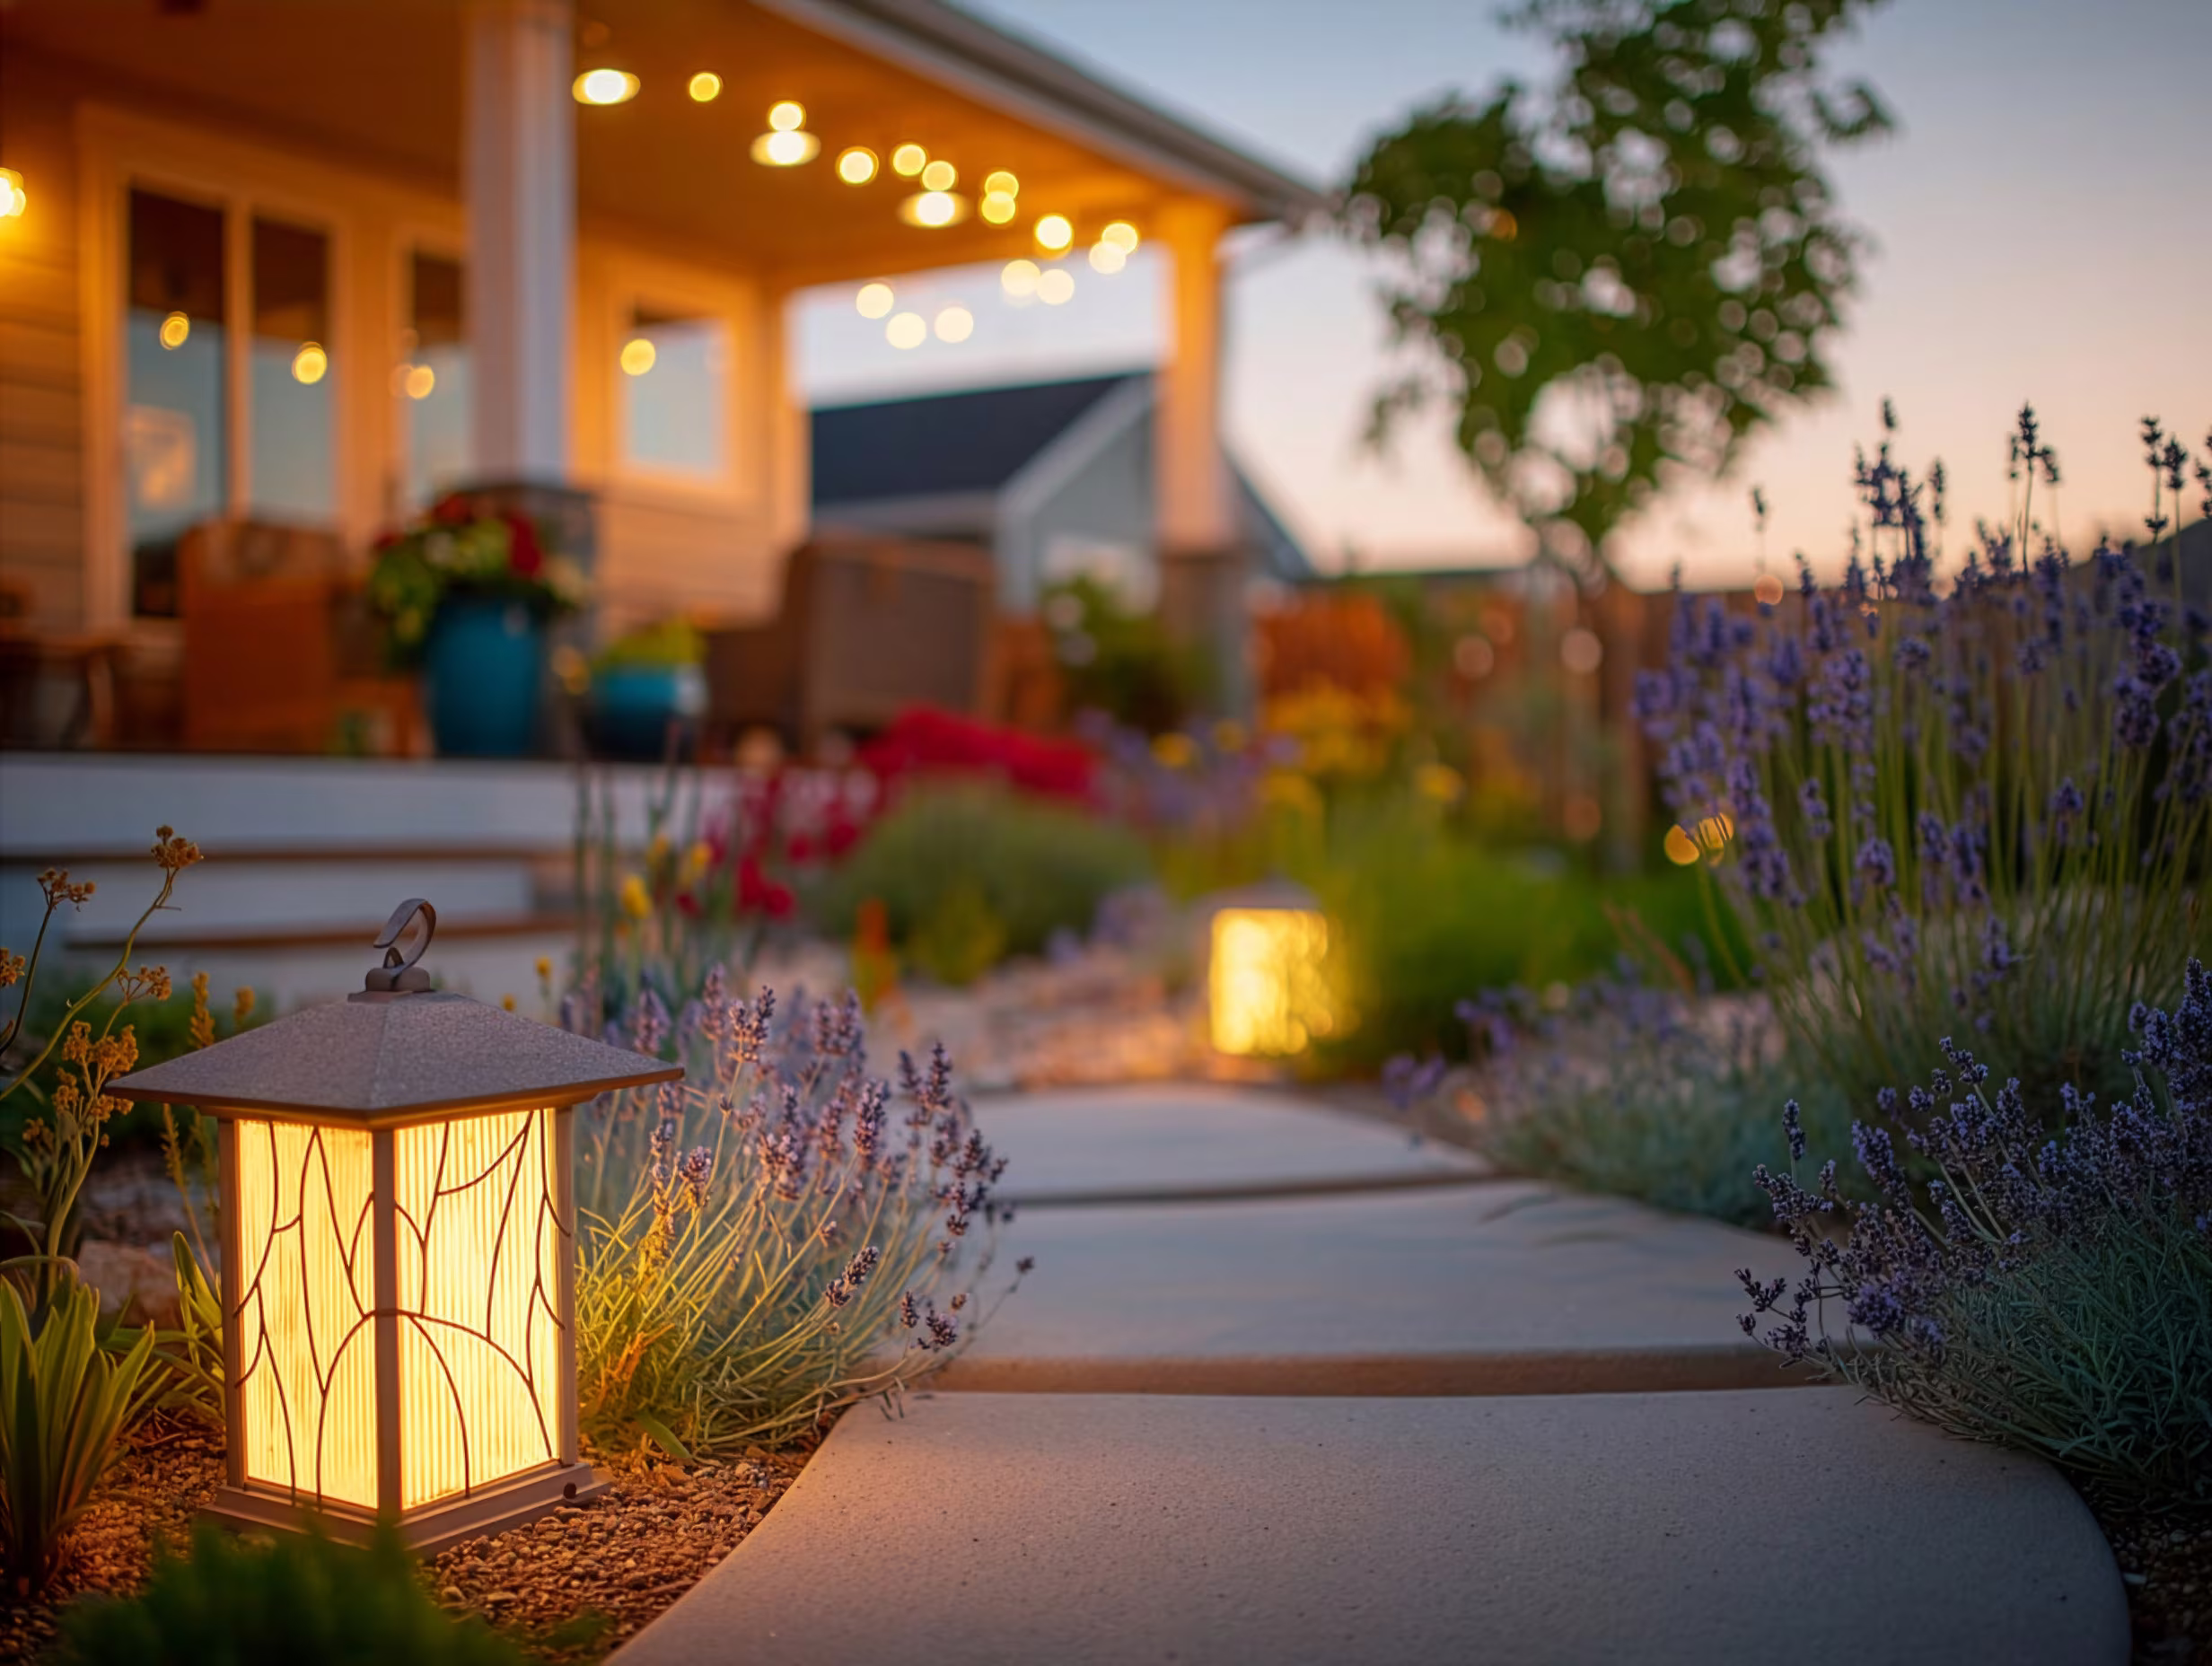
Pathway lights work at ground level, close to the landscape, illuminating the surfaces you walk on and the plants you walk past. They turn a yard that goes dark at sunset into a space that reveals itself in a different, often more beautiful way after the sun drops below the roofline.
KEY TAKEAWAYS
- Pathway lights do more than illuminate a walkway: they define the structure of your outdoor space after dark, turning a yard you leave at sunset into one you walk through all evening long.
- Solar pathway lights perform exceptionally well in Southern California, where 280 or more sunny days per year keep batteries fully charged, but low voltage path lights deliver brighter, more consistent output for longer pathways and accent-heavy designs.
- Proper spacing (six to eight feet apart, staggered on alternating sides) and placement along decomposed granite, gravel, or stepping stone paths creates both safe footing and a visual rhythm that draws you deeper into your Yardtopia.
This guide covers everything you need to choose the right pathway lights for your yard, place them where they matter most, and install them in a way that lasts. Whether you are lighting a front walkway through California natives or a backyard path through a water-wise garden, the principles are the same: light what you walk on, accent what you walk past, and create a yard that invites you out at every hour.
What Makes Pathway Lighting Different from Other Outdoor Lighting?
Porch lights illuminate an entry point. Floodlights wash a broad area for security. Accent lights highlight a single feature. Pathway lights do something more subtle and more structural: they define movement through a space. They tell your eye and your feet where to go, how fast to move, and what to notice along the way.
The best walkway lighting creates what designers call a "rhythm of light," a repeating pattern of illumination and shadow that guides you forward without overwhelming the landscape around the path. Each fixture lights a small pool of ground, enough to see where you are stepping, while the gaps between fixtures let your eyes adjust and appreciate the plantings, textures, and hardscape features that line the route.
This is why pathway lights matter so much in water-wise Southern California landscapes. Drought-tolerant yards rely on texture, form, and ground plane variety: decomposed granite, gravel mulch, stepping stones set into creeping thyme, boulders anchoring a dry creek bed. During the day, these elements carry the design. At night, without lighting, they disappear into a flat, featureless dark. Pathway lighting brings that texture back after sunset, and often makes it look even more striking than it does under full sun.
GOOD TO KNOW
A well-designed pathway lighting plan can increase perceived property value by making a home's landscaping visible during evening hours, when many buyers and neighbors first see a property. Real estate professionals consistently note that landscape lighting contributes to meaningful cost recovery, with pathway lighting being the most immediately noticeable element from the street.
Which Type of Pathway Lights Should You Choose: Solar or Low Voltage?
This is the first decision most homeowners face, and in Southern California, the answer depends less on which technology is "better" and more on what your specific yard needs. Both solar and low voltage path lights work well here. The question is which one matches your pathway length, your landscape design, and how much flexibility you want.
Solar Pathway Lights: The SoCal Advantage
Southern California homeowners have a genuine advantage with solar pathway lights. The region receives 280 or more sunny days per year, which means solar panels charge reliably in every season, including winter. Solar path lights require no wiring, no transformer, and no electrical work. You push the stake into the ground, position the solar panel toward the sun, and the light turns on automatically at dusk.
Modern solar pathway lights have improved dramatically in the past few years. High-quality models use lithium iron phosphate batteries that hold a charge for 10 to 12 hours and last three to five years before replacement. LED output has increased to 15 to 50 lumens per fixture, which is enough to illuminate a three to four foot circle of walkway comfortably.
Best for: Short to medium pathways (under 60 feet), front yard walkways with good sun exposure, homeowners who want zero installation complexity, yards where running wire is impractical (rocky soil, established hardscape, or no nearby electrical outlet).
Limitations: Solar fixtures produce less light than low voltage alternatives. Output fades during extended cloudy stretches (rare in Southern California, but it happens during June gloom). Fixtures must receive at least six hours of direct sun for full evening performance. Shaded pathways under mature trees or along north-facing walls are not ideal for solar.
PRO TIP
Consider a hybrid approach. Use solar pathway lights along your front walkway where sun exposure is strong and installation simplicity matters, then run a low voltage system through your backyard garden where shade from trees or structures limits solar charging. This gives you the best of both technologies without forcing either one into a situation where it underperforms.
Low Voltage Path Lights: Brighter, More Consistent, More Design Control
Low voltage pathway lighting (12-volt systems) connects fixtures to a transformer plugged into a standard outdoor GFCI outlet. The transformer steps household 120-volt power down to a safe 12 volts, which means the wiring buried alongside your path carries no dangerous current. You can handle every connection without an electrician.
The trade-off for slightly more installation effort is significantly more lighting control. Low voltage path lights produce 50 to 200 lumens per fixture, enough to illuminate wider paths, accent adjacent plantings, and create layered lighting effects that solar fixtures cannot match. You can connect different fixture types to the same transformer: path lights along the walkway, spot lights on a specimen agave, a wash light across a boulder grouping, all running on one system.
Best for: Longer pathways, backyard garden paths with shaded sections, homeowners who want to combine pathway lighting with accent lighting on the same system, landscapes where consistent brightness matters (entertaining paths, safety-critical walkways near steps or grade changes).
Limitations: Requires a nearby outdoor GFCI outlet (or installation of one). Wire must be buried or concealed. The transformer needs a weatherproof location. Slightly higher upfront cost than solar.
Quick Comparison: Solar vs. Low Voltage Pathway Lights
| Feature | Solar | Low Voltage |
|---|---|---|
| Installation | No wiring, push into ground | Bury wire, connect to transformer |
| Brightness | 15-50 lumens | 50-200 lumens |
| Consistency | Depends on sun exposure | Constant (transformer powered) |
| Cost per fixture | $15-50 (quality models) | $30-80 (fixture only) |
| System cost (8-12 fixtures) | $120-500 | $300-800 (incl. transformer) |
| Maintenance | Replace battery every 3-5 years | Replace LED module every 10+ years |
| SoCal advantage | 280+ sunny days = reliable charge | No freeze-thaw on buried wire |
| Best placement | Sun-exposed front walkways | Any path, including shaded areas |
How Do You Space and Place Pathway Lights for the Best Effect?
Spacing and placement matter more than the fixtures themselves. A row of expensive path lights installed too close together creates a runway effect that looks commercial and uninviting. Fixtures spaced too far apart leave dark gaps where footing becomes uncertain. The goal is a natural rhythm that feels intentional without feeling engineered.
"Start by figuring out how you are going to use the space … a lack of a big-picture planning can disrupt the possibility for design."
— Farah Saquib, Partner, Urban Ecology Studio
The 6-to-8-Foot Rule
For most residential pathways, space fixtures 6 to 8 feet apart. This creates overlapping pools of light on the ground with gentle transitions between them, enough illumination for safe walking without the harsh brightness of continuous lighting. Shorter spacing (4 to 5 feet) works for steps, grade changes, and curves where extra visibility improves safety. Wider spacing (8 to 10 feet) works along straight, flat sections where the eye can see farther ahead.
Stagger, Do Not Line Up
Place pathway lights on alternating sides of the walkway rather than in matched pairs directly across from each other. Staggered placement creates a more natural, organic lighting pattern that feels like a garden path rather than an airport taxiway. It also uses fewer fixtures to light the same distance, which reduces cost and visual clutter.
Light the Curves and Intersections
Every curve in a pathway deserves a light at the turn point. Curves are where people are most likely to step off the path, and they are also where the pathway design is most interesting. Place a fixture at the inside of each curve so walkers can see the path bending ahead of them. At intersections where paths meet, light both directions so guests instinctively understand their options.
Placement for Water-Wise Landscapes
Southern California yards built around drought-tolerant plantings and hardscape ground planes have specific pathway lighting considerations:
Decomposed granite and gravel paths: These surfaces reflect light more than mulch or turf, which means each fixture's pool of light appears brighter and spreads farther. You may be able to space fixtures slightly wider (8 to 10 feet) on light-colored DG or gravel without losing adequate illumination. Position fixtures at the path edge rather than in the path surface to avoid contact with foot traffic and raking.
Stepping stone paths: Place a light near every second or third stepping stone to illuminate the surface you are stepping onto. The irregular spacing of stepping stones through ground cover or gravel naturally creates an organic lighting rhythm that looks intentional.
Paths through native plantings: Low fixtures (12 to 18 inches tall) work best alongside drought-tolerant plantings that stay compact. Taller fixtures (18 to 24 inches) suit paths bordered by ornamental grasses like deer grass or purple needle grass, where the light needs to clear the foliage line.
Gravel and DG pathways as firebreaks: In fire-conscious Southern California landscapes, gravel and decomposed granite pathways often serve double duty as defensible space buffers. Pathway lighting along these routes adds evening safety while highlighting a design feature that already serves a practical purpose. For more on designing with fire resistant landscaping, gravel pathways offer both beauty and protection.
GOOD TO KNOW
The color of your pathway surface affects how much light you need. Light-colored decomposed granite reflects noticeably more light than dark surfaces, which means your path lights produce a wider, softer pool of illumination. If your pathway is dark mulch or dark-colored stone, consider spacing fixtures slightly closer together or choosing higher-lumen models.
What Pathway Light Styles and Fixtures Work Best for Southern California Yards?
Pathway light fixtures come in a range of styles, from sleek modern bollards to traditional lantern shapes to nearly invisible mushroom caps that blend into the landscape. The right choice depends on your home's architecture, your landscape style, and how visible you want the fixtures to be during the day.
Bollard Lights: Clean Lines for Modern Landscapes
Bollard path lights stand 18 to 30 inches tall with cylindrical or rectangular profiles that complement modern, minimalist landscape designs. They cast light downward in a 360-degree pattern and look equally strong alongside concrete pavers, decomposed granite, and architectural plantings like agave and ornamental grasses. Choose dark bronze or black finishes that recede into the landscape during daylight hours.
Mushroom and Hat-Top Lights: Classic and Unobtrusive
The mushroom or hat-top path light is the most common residential pathway fixture for good reason. The wide cap directs light downward and outward while shielding the bulb from direct view, which reduces glare and keeps the focus on the illuminated ground rather than the fixture itself. These lights range from 14 to 22 inches tall and suit traditional, craftsman, and transitional landscape styles.
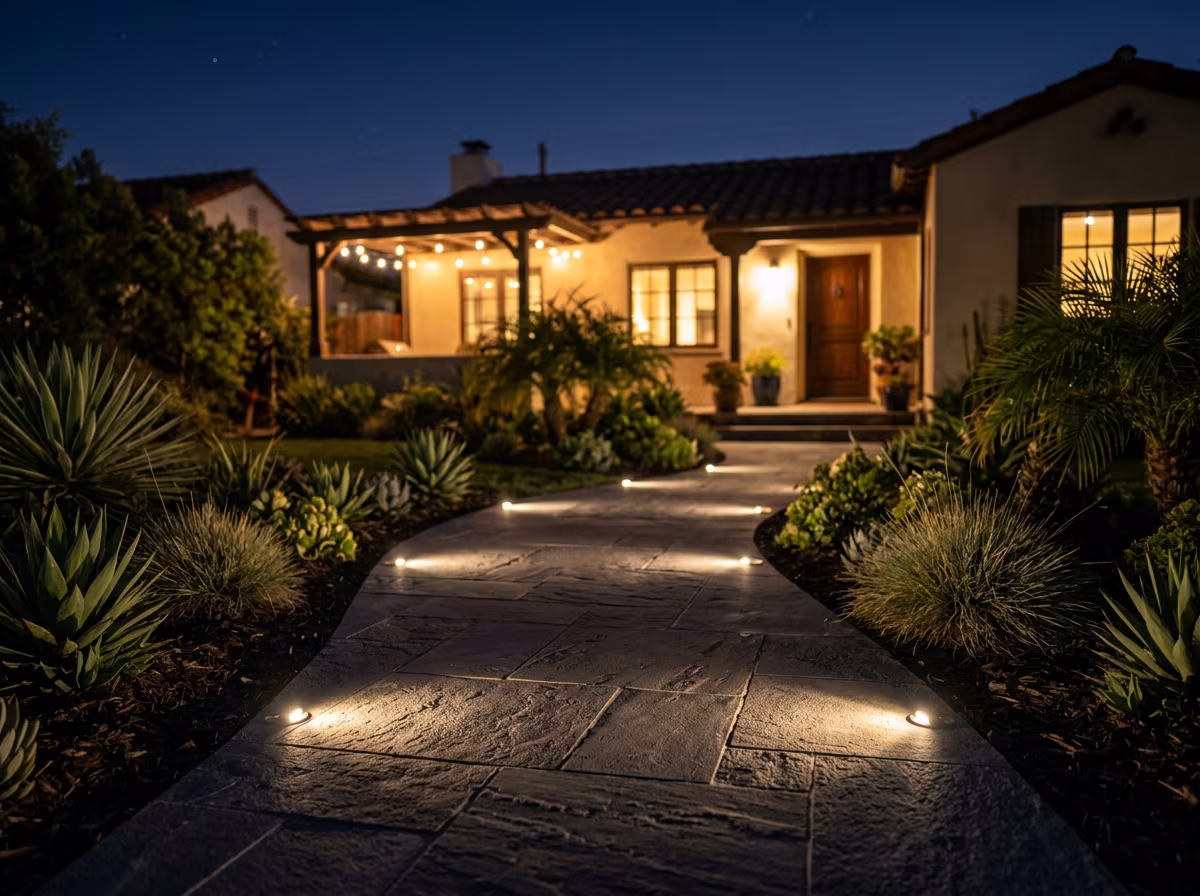
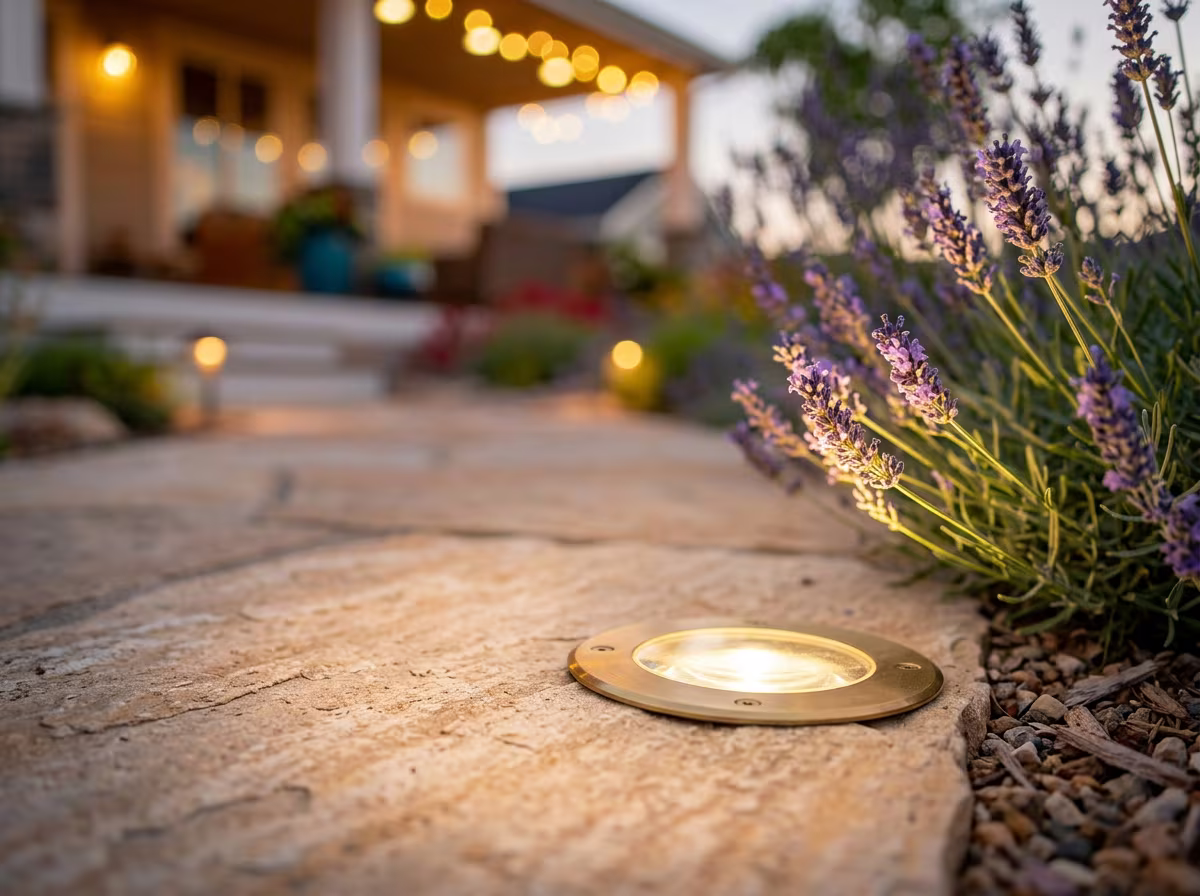
Flush and In-Ground Lights: Invisible by Day, Dramatic by Night
Flush-mounted or in-ground pathway lights sit level with the walking surface, casting light upward across the path from the edges. They disappear entirely during the day, which makes them ideal for homeowners who want evening lighting without visible fixtures in their landscape. Installation requires cutting into hardscape (pavers, concrete, or stone) and is best suited for paths being built or renovated rather than existing ones.
Fixture Materials That Last in Southern California
Not all fixture materials hold up equally in our climate. The combination of UV exposure, dry heat, occasional coastal moisture, and Santa Ana wind-driven grit demands durable construction:
Solid brass and copper: The gold standard for longevity. Develops a natural patina over time that many homeowners find more attractive than the original finish. Will not corrode, rust, or degrade under UV exposure. Expect a 20 to 30 year lifespan.
Cast aluminum with powder coating: Lighter than brass, less expensive, and available in a wider range of finishes. Quality powder-coated aluminum resists fading and corrosion well. Inspect the coating annually for chips that could allow moisture to reach the base metal.
Stainless steel: Performs well but can show fingerprints and water spots. Best for contemporary designs where the metallic surface is part of the aesthetic.
Plastic and composite: Budget-friendly but UV degradation is a real concern in Southern California. Plastic fixtures become brittle and discolor within two to four years of full sun exposure. If budget is tight, invest in fewer quality fixtures spaced slightly wider rather than more cheap ones that need replacing.
How Do You Install Pathway Lights Along a Water-Wise Walkway?
Installing pathway lights is one of the most accessible outdoor DIY projects, especially in Southern California where the soil does not freeze and buried wire faces no frost-heave risk. Here is a practical overview for both solar and low voltage systems.
Solar Installation: Simple as It Gets
Solar pathway lights require almost no installation. Push the ground stake into soil alongside your path, angle the solar panel toward the south or west for maximum sun exposure, and let the light charge for 24 hours before its first evening. For paths through DG or gravel, you may need a small pilot hole (use a screwdriver or narrow dowel) to prevent the stake from bending in compacted ground.
Positioning for SoCal sun: South-facing solar panels receive the most consistent sun year-round. West-facing panels catch strong afternoon sun but miss morning light. Avoid placing solar fixtures under tree canopies, dense shrub coverage, or on the north side of walls and fences where shadow falls for most of the day.
Low Voltage Installation: A Weekend Afternoon Project
A low voltage pathway lighting system involves four components: a transformer, low voltage cable (typically 12-gauge or 14-gauge landscape wire), connectors, and the fixtures themselves. The process follows a straightforward sequence.
Step 1: Plan your layout. Walk your pathway and mark fixture positions with small flags or stakes. Note where the transformer will sit (within three feet of a GFCI outdoor outlet) and measure the total cable run from transformer to the farthest fixture.
Step 2: Size your transformer. Add the wattage of all fixtures, then choose a transformer rated for 20 to 30 percent more than the total. This headroom accounts for voltage drop over distance and allows you to add fixtures later without replacing the transformer.
Step 3: Run cable alongside the path. Lay the cable in a trench at least six inches deep parallel to the pathway, following manufacturer guidelines. In decomposed granite or gravel paths, tuck the cable to the proper depth and cover with the path material. In soil beds alongside hardscape paths, maintain adequate burial depth to protect the cable from raking and cultivation.
Step 4: Connect fixtures. Most modern low voltage pathway lights use snap-on or pierce-point connectors that clamp directly onto the cable without cutting or splicing. Position each fixture, connect it to the cable, and push the ground stake into place.
Step 5: Test at night. Wait for full dark, then walk the path. Adjust fixture positions, angles, and heights until the lighting feels balanced. This is the step most people skip, and it is the most important one. What looks right during the day often needs adjustment once you see the actual light patterns on the ground.
GOOD TO KNOW
Before digging any trench for low voltage wire, call 811 (the national utility locator service) to mark underground utility lines. Even a standard 6-inch trench can intersect irrigation lines, cable TV conduit, or shallow gas lines. In established Southern California neighborhoods, underground utilities are common and not always where you expect them. The call is free and typically scheduled within two business days.
How Do You Use Pathway Lighting to Create Outdoor Living Spaces After Dark?
Pathway lights do their functional job by illuminating where you walk. But they do something more important for your Yardtopia: they define the edges of outdoor rooms that only exist after sunset.
A well-lit path from your back door to a patio seating area creates a sense of journey and arrival. The path says "this way," and the destination, lit differently with string lights or a fire feature, says "you are here." Without the pathway lighting, the transition feels abrupt. You step from a lit doorway into undefined darkness and then suddenly arrive at a lit patio. The in-between matters.
Think about the paths your family actually walks in the evening. The route from the kitchen door to the grill. The walkway to the fire pit where you gather on weekends. The front path guests follow when they arrive for dinner. These are the paths that deserve lighting first, because they connect the moments that make your outdoor space feel like an extension of your home.
For families with children, pathway lights serve a practical safety function during evening play. Well-lit walkways help kids navigate between play zones, and the consistent lighting reduces the stumbling and uncertainty that sends families inside when the sun goes down. A path lit from the back door to the play area tells your children, and reassures you, that the yard is still their space after dark. For more on creating safe, engaging kid-friendly backyard ideas, well-lit pathways are a foundational element.
In shaded areas of your yard, where tree canopy or structures block ambient light, pathway lighting becomes even more important. These are often the most interesting parts of a landscape, mature plantings, garden rooms, seating nooks tucked into corners, but they go unused after dark without intentional lighting. If you have invested in backyard shade ideas for daytime comfort, pathway lighting ensures those same spaces remain accessible and inviting in the evening.
PRO TIP
Color temperature sets the mood. For pathway lighting, 2700K (warm white) creates the most inviting, residential feel. It mimics the warmth of candlelight and incandescent bulbs without the orange cast of lower temperatures. Avoid anything above 4000K for residential pathways; cooler temperatures create a commercial, institutional feel that works against the "your Yardtopia" atmosphere. Most quality LED pathway lights offer 2700K as a standard option.
Frequently Asked Questions
How far apart should pathway lights be?
Space pathway lights 6 to 8 feet apart for most residential walkways. Closer spacing (4 to 5 feet) improves safety at curves, steps, and grade changes. Wider spacing (8 to 10 feet) works on straight, flat sections, especially along light-colored surfaces like decomposed granite that reflect more light. Stagger fixtures on alternating sides of the path rather than placing them in matched pairs for a more natural appearance.
Do solar pathway lights work well in Southern California?
Solar pathway lights perform exceptionally well in Southern California because the region receives 280 or more sunny days per year. Quality solar fixtures with lithium iron phosphate batteries charge fully in six to eight hours of sun and provide 10 to 12 hours of illumination. The main limitation is shaded locations: if a pathway runs under dense tree canopy or along a north-facing wall, low voltage lights are a better choice for those sections.
How many lumens do pathway lights need?
Most pathway lights produce 15 to 100 lumens per fixture, and for residential walkways, 30 to 50 lumens per fixture is the sweet spot. Higher lumens (80 to 200) suit wide commercial-style paths or areas where safety requires brighter illumination, like steps and intersections. Lower lumens (15 to 30) create a softer, more ambient effect for garden paths where mood matters more than task lighting.
Can you install pathway lights in decomposed granite or gravel?
Yes. Push the ground stake through a pre-made pilot hole in compacted DG or gravel. For low voltage systems, run cable in a trench alongside the path (at least six inches deep per standard guidance) and cover with the path material. The gravel or DG surface actually benefits pathway lighting by reflecting light across a broader area than dark mulch or soil, which means you may need fewer fixtures for the same visual effect.
What is the best color temperature for outdoor pathway lights?
Warm white (2700K) is the standard recommendation for residential pathway lighting. It creates an inviting, comfortable glow that complements the warm tones of decomposed granite, natural stone, and copper or bronze fixtures. Avoid cool white (4000K and above) for pathways, as it creates a harsh, commercial appearance. Some smart pathway lights offer adjustable color temperature, but most homeowners set them to 2700K and leave them there.
How long do pathway lights last?
LED pathway lights last 25,000 to 50,000 hours, which translates to 10 to 20 years at typical residential usage (four to six hours per evening). Fixture bodies made from solid brass or copper last even longer, often 20 to 30 years. Solar batteries are the most frequent replacement item, lasting three to five years before output noticeably declines. Low voltage transformers typically last 10 to 15 years with minimal maintenance.
Do pathway lights increase home value?
Landscape lighting, including pathway lighting, delivers meaningful cost recovery according to industry research. Pathway lighting specifically improves curb appeal by making landscaping visible during evening hours, when many potential buyers first see a property. Beyond resale value, pathway lights increase the functional use of your outdoor space by extending it into evening hours for dining, entertaining, and relaxation.
The Bottom Line
Pathway lights are one of the simplest, most impactful upgrades you can make to your outdoor space. They do three things at once: they keep your family safe on walkways after dark, they reveal the beauty of your landscape in a completely different light, and they connect the spaces in your yard so the whole property feels usable well past sunset.
Start here: walk your yard at dusk and notice the paths you actually use in the evening. Those are your first lighting priorities. Choose solar for sun-drenched front walkways and low voltage for shaded or longer garden paths. Space fixtures 6 to 8 feet apart, stagger them on alternating sides, and light every curve and intersection. Test your layout at night and adjust until the rhythm feels right.
Your pathway is already there, connecting your front door to your garden, your back door to your fire pit, your patio to the quiet corner where you sit with a glass of wine after the kids are in bed. The lights simply let you use it at every hour. Explore more landscape lighting ideas and start planning your evening Yardtopia. Find yourself outside.