Raised garden beds are one of the simplest upgrades for a Southern California homeowner and an easy place to start to create or add to your Yardtopia. Not only can they be customizable to your needs, but they solve problems that frustrate gardeners such as compacted clay soil that refuses to drain, caliche layers that block root growth, and ground-level pests that treat your vegetables like a buffet. By lifting your growing area above ground level, you control every variable that matters. And it's a great way to add color and function to your Yardtopia.
KEY TAKEAWAYS
- Raised garden beds give you complete control over soil quality, drainage, and layout, making them one of the most effective ways to grow food in Southern California's clay-heavy soils and year-round sunshine.
- A basic 4x8 cedar bed costs $100-300 in materials depending on your lumber choice and takes a single afternoon to build, with no advanced carpentry skills required.
- The right soil mix matters more than the frame material -- a blend of quality topsoil, compost, and aeration amendments creates the foundation for everything you grow.
The benefits go beyond better soil. Raised beds warm faster in spring, drain more efficiently after winter rains, and let you garden at a comfortable height that saves your back and knees. In a region where the growing season stretches across all twelve months, that means more harvests, less maintenance, and a Yardtopia that gives something back every time you step outside. This guide covers the full journey from first idea to first harvest: choosing your materials, building a bed step by step, filling it with the right soil mix, picking what to plant for our climate, and setting up efficient watering so nothing goes to waste. Whether you are replacing a tired patch of lawn or adding your first garden bed along a sunny fence line, you will find everything you need to get growing this weekend.
Why Are Raised Garden Beds Worth the Effort?
Raised beds solve the number one frustration Southern California gardeners face: the soil. Much of Orange County sits on clay-heavy alluvial soil or compacted fill from development. Some inland areas have caliche, a cement-like calcium carbonate layer that blocks drainage and root growth entirely. Digging into that ground and hoping for the best is a recipe for disappointment. A raised bed bypasses all of it. You build a frame, fill it with a purpose-made soil mix, and start growing in a medium you designed rather than one geology handed you. Roots grow deeper because the soil is loose. Water drains properly because the mix is engineered for it. And because you are not fighting clay or rocks, planting day feels like a weekend project rather than a construction job.
GOOD TO KNOW
Raised beds can produce up to twice the yield per square foot compared to traditional in-ground row gardens. The loose soil allows closer plant spacing, and the defined growing area makes it easier to concentrate nutrients, water, and attention where they matter most.
The practical advantages add up quickly. Raised beds reduce bending and kneeling (a 12-inch bed puts your garden within easy reach, and taller beds can be built for wheelchair or standing access). The defined edges keep pathways clean, make mulching straightforward, and create a visual structure that organizes even a small backyard. For families, a raised bed becomes a contained, manageable project that children can help plant and tend without wandering through a sprawling garden. In Southern California specifically, raised beds pair naturally with water-efficient gardening. The contained soil holds drip irrigation exactly where plants need it, mulch stays in place rather than washing across a flat yard, and the elevated frame dries out just enough between waterings to prevent the root rot that plagues overwatered in-ground gardens in our mild winters.
What Size and Shape Work Best for Your Yard?
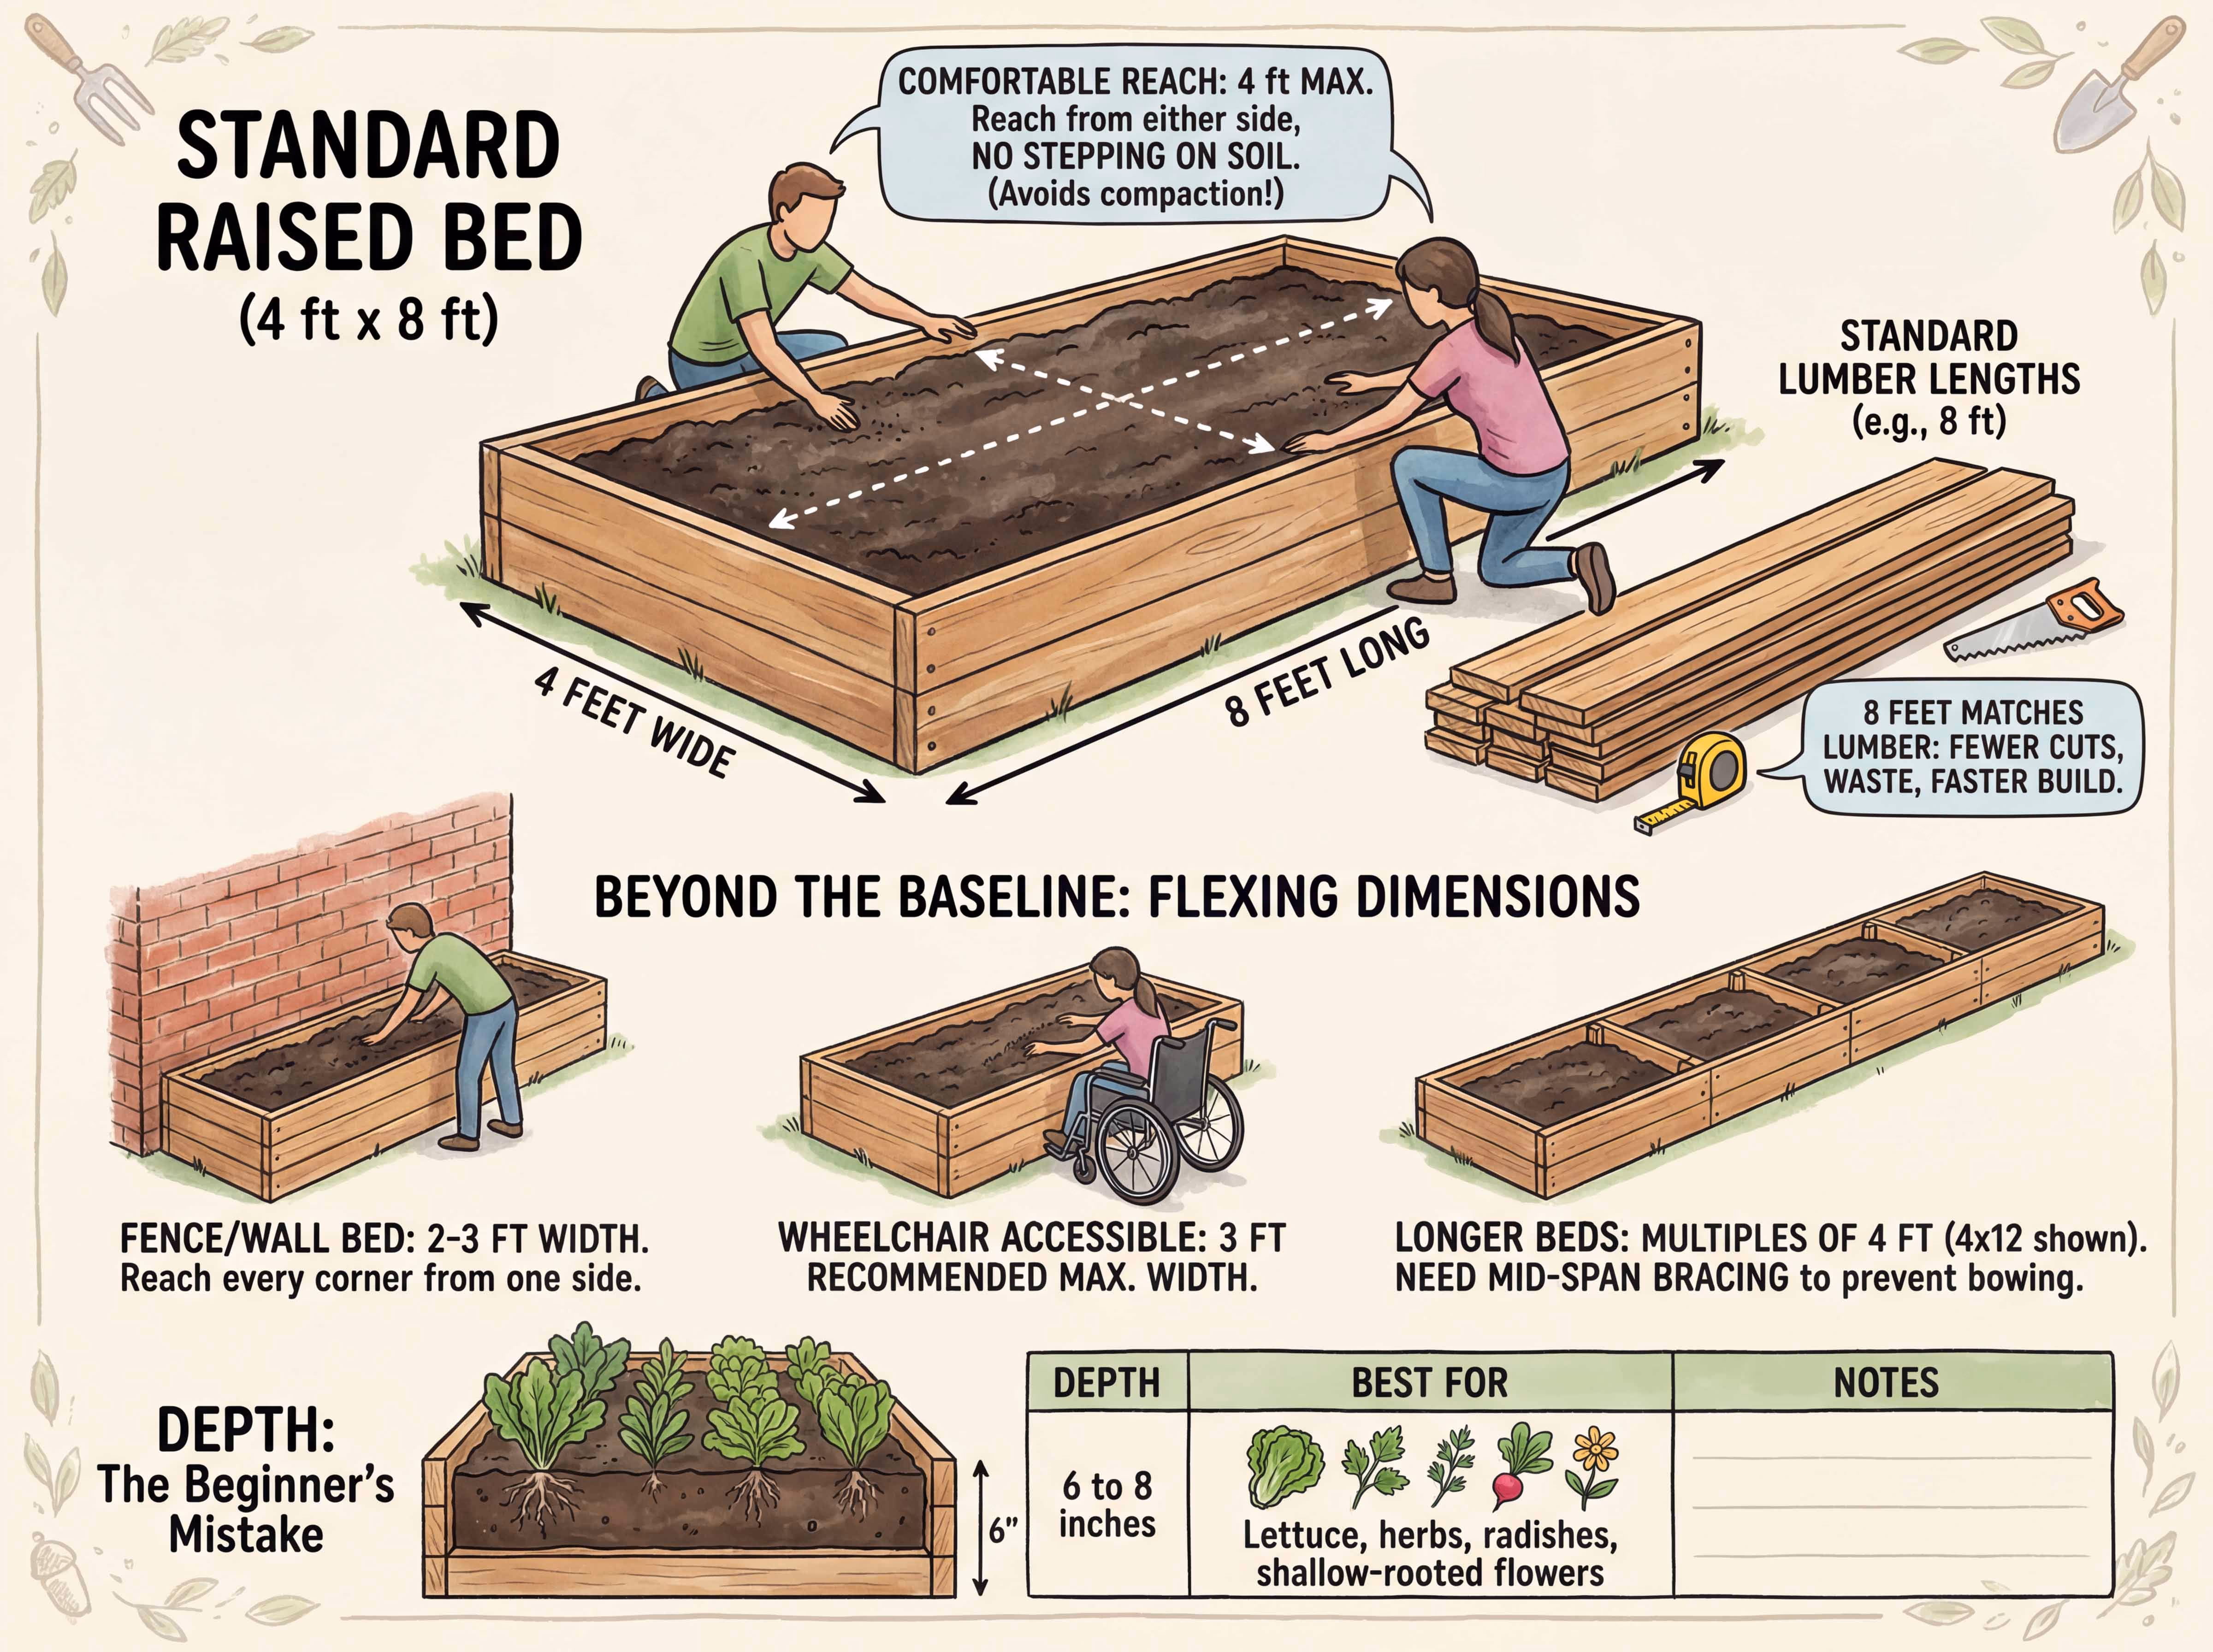
The standard raised bed is 4 feet wide and 8 feet long, and there is a good reason those dimensions show up in nearly every guide. Four feet is the maximum width that allows a comfortable reach to the center from either side, so you never need to step on the soil (compacting it would undo the drainage and root-growth advantages). Eight feet matches standard lumber lengths, which means fewer cuts, less waste, and a faster build. Beyond that baseline, dimensions flex to fit your space and your goals. Width: 4 feet maximum when accessible from both sides. If your bed sits against a fence or wall, limit the width to 2 to 3 feet so you can reach every corner from the open side. For wheelchair-accessible beds, 3 feet is the recommended maximum. Length: 8 feet is the sweet spot. Multiples of 4 feet (4x4, 4x8, 4x12) are the most lumber-efficient. Longer beds may need mid-span bracing to prevent the sides from bowing outward under soil pressure. Depth: This is where most beginners make their first mistake.
| Depth | Best For | Notes |
|---|---|---|
| 6 to 8 inches | Lettuce, herbs, radishes, shallow-rooted flowers | Minimum viable depth for growing |
| 12 inches | Most vegetables, peppers, beans, squash | Recommended starting point for most gardeners |
| 18 inches | Tomatoes, carrots, potatoes, deep-rooted crops | Ideal for intensive production; retains moisture longer |
| 24 to 36 inches | Accessibility or patio placement | Reduces bending; wheelchair-friendly at 24 inches or higher |
PRO TIP
Orient your beds north to south so both long sides receive equal sunlight throughout the day. If you are placing a bed against a south-facing fence, plant taller crops (tomatoes, trellised beans) on the north end so they do not shade shorter plants like herbs and lettuce. In Southern California's intense summer sun, some afternoon shade from a nearby tree or structure can actually benefit cool-season crops.
Pathway spacing: Leave at least 3 feet between beds for comfortable access with a wheelbarrow or kneeling pad. A well-planned layout turns your Yardtopia into something you can navigate effortlessly, whether you are hauling soil or just wandering out with a morning coffee. If wheelchair access is a priority, plan for 4-foot pathways. Small yards: A single 4x4 bed tucked into a sunny corner can produce a surprising amount of food. Pair it with a trellis on the north side for vertical growing (cucumbers, pole beans, small melons), and you have doubled your growing space without doubling the footprint.
Which Materials Should You Choose?
The frame is the most visible decision, and the material you pick affects cost, lifespan, and the look of your Yardtopia. The good news: there is no single best choice. The right material depends on your budget, your timeline, and how you want the bed to look in your backyard.
| Material | Approx. Cost (4x8 Bed) | Lifespan | Best For |
|---|---|---|---|
| Cedar (fence pickets) | $30 to $60 | 10 to 15 years | Budget builds, first-time projects |
| Cedar (2x6 or 2x12 boards) | $100 to $250 | 10 to 15 years | Classic look, proven performance |
| Redwood | $120 to $300 | 15 to 20 years | SoCal builders (locally available, superior rot resistance) |
| Corrugated metal (DIY) | $100 to $200 | 20 to 50 years | Modern aesthetic, zero rot |
| Concrete block | $50 to $100 | 50+ years | Lowest cost, most durable |
| Composite lumber | $200 to $400 | 25 to 50 years | No maintenance, long-term investment |
| Metal kit (Birdies, Vego) | $250 to $400 | 20+ years | Easiest assembly, modular design |
| Cedar kit (Greenes Fence) | $150 to $250 | 10 to 15 years | Pre-cut convenience |
Cedar and Redwood: The Natural Choice
Cedar is the most popular material for raised beds, and for good reason. Its natural oils resist rot, decay, and insects without any chemical treatment. A cedar bed lasts 10 to 15 years with zero maintenance. It weathers to a soft silver-gray that looks at home in any landscape style. Redwood deserves special attention for Southern California builders. It has the highest natural rot resistance of any North American wood, and because it grows on the West Coast, it is often more affordable here than in other parts of the country. A redwood bed can last 15 to 20 years. If your local lumberyard carries it, compare prices before defaulting to cedar.
GOOD TO KNOW
For the most affordable wood build, look at cedar fence pickets. At $3 to $4 each, you can frame a full 4x8 bed for under $50 in lumber. The boards are thinner (roughly 5/8 inch) than standard 2x6 lumber, so they will not last quite as long, but they make an excellent starter bed for gardeners who want to try raised bed growing before investing in premium materials.
Galvanized and Corrugated Metal: Modern and Virtually Indestructible
Galvanized steel beds have surged in popularity for their clean, modern look and extraordinary durability. The zinc coating is food-safe and will not leach harmful chemicals into your soil. A common concern is heat: will metal beds cook plant roots in Southern California summers? Research shows that soil near the edges of a metal bed runs about 8 to 10 degrees warmer than the center, but center soil temperatures remain similar to in-ground soil. Mulching and morning watering offset any edge warming easily. DIY corrugated metal beds cost $100 to $200 for a 4x8 frame. Pre-made metal kits from Birdies and Vego run $250 to $400 and assemble in under an hour with no tools.
Concrete Block: The Budget Champion
Standard 8x8x16-inch concrete blocks cost $1.50 to $3.00 each at your local home improvement store. A 4x8 bed one block high runs $50 to $100 total, making concrete block the cheapest rigid option available. No hardware needed beyond possibly rebar for stacking. The hollow cores can be filled with soil and planted with herbs for a bonus growing strip along the edges. The tradeoff is aesthetic: concrete block has an industrial look that works well in some yards and less well in others.
GOOD TO KNOW
Avoid pressure-treated lumber and railroad ties for beds where you plan to grow food. Railroad ties contain creosote, a known carcinogen. Modern pressure-treated wood (ACQ, copper azole) no longer contains arsenic and is considered low-risk by the EPA, but it is not approved for organic growing. For peace of mind with edible gardens, stick with naturally rot-resistant wood, metal, or concrete.
Kit vs. DIY: How to Decide
If you own a drill and a saw, building from lumber saves money and lets you customize dimensions exactly. If tools and time are limited, a pre-made kit gets you growing faster with less effort.
| Factor | DIY Build | Pre-Made Kit |
|---|---|---|
| Cost (4x8) | $50 to $250 | $150 to $400 |
| Assembly time | 2 to 3 hours | 30 to 60 minutes |
| Tools needed | Saw, drill, tape measure, level | Usually none or just a screwdriver |
| Customization | Any size, any depth | Fixed sizes (some modular) |
| Skill level | Basic carpentry | No experience needed |
How Do You Build a Raised Garden Bed Step by Step?
A standard 4x8-foot cedar bed at 12 inches tall is the most versatile size for vegetable gardening. This build uses two courses of 2x6 boards with 4x4 corner posts and takes one afternoon to complete.
What You Need
Materials: (6) 2x6x8-foot cedar boards (1) 4x4x8-foot cedar post (for corner supports) (1 lb) 2-1/2 or 3-inch exterior deck screws (stainless steel or coated) Optional: 1/2-inch hardware cloth (4x8 sheet) for gopher protection Optional: landscape staples to secure hardware cloth
Tools: Circular saw or miter saw Drill/driver Tape measure Carpenter's square 4-foot level Pencil Clamps (helpful for holding boards during assembly) Safety glasses
Budget version: Substitute cedar fence pickets (11 to 12 pickets at $3 to $4 each) for the 2x6 boards. Total lumber drops to $30 to $50.
Cut List
Long sides: (4) 2x6 boards at 8 feet (no cuts needed) Short sides: (4) 2x6 boards at 45 inches (cut from the remaining 2 boards; each 8-foot board yields two 45-inch pieces) Corner posts: (4) 4x4 posts at 12 inches
The short sides are 45 inches (not 48) to account for the thickness of the long-side boards overlapping at each end.
Assembly
Choose your spot. Pick a location that receives 6 to 8 hours of direct sunlight. Level the ground by scraping high spots or adding paver sand to low areas. Remove any grass or weeds from the footprint.
Cut the lumber. Cut three 8-foot boards in half to create six 45-inch short-side pieces. Cut the 4x4 post into four 12-inch corner posts.
Pre-drill. Drill pilot holes near the ends of all boards to prevent cedar from splitting. Space screws approximately 8 to 10 inches apart.
Build the first layer. Attach two 8-foot boards and two 45-inch boards to the four corner posts, driving 3 screws per joint. The long boards overlap the ends of the short boards at each corner.
Add the second layer. Stack the second course of boards on top and attach with 3 screws per corner, driving into the corner posts. Stagger the joints if desired for added rigidity.
Check for square and level. Use a level on all four sides. Measure diagonals corner to corner: if both measurements match, the bed is square. Adjust by scraping soil or shimming as needed.
Install gopher protection (recommended). Cut the hardware cloth slightly larger than the bed footprint. Staple it to the bottom of the frame before positioning the bed. In Southern California, gophers can destroy an entire bed overnight. This step is not optional if you have seen mounds in your yard.
Set the bed in place. Position the completed frame, confirm it sits level and stable, and press it gently into the ground.
GOOD TO KNOW
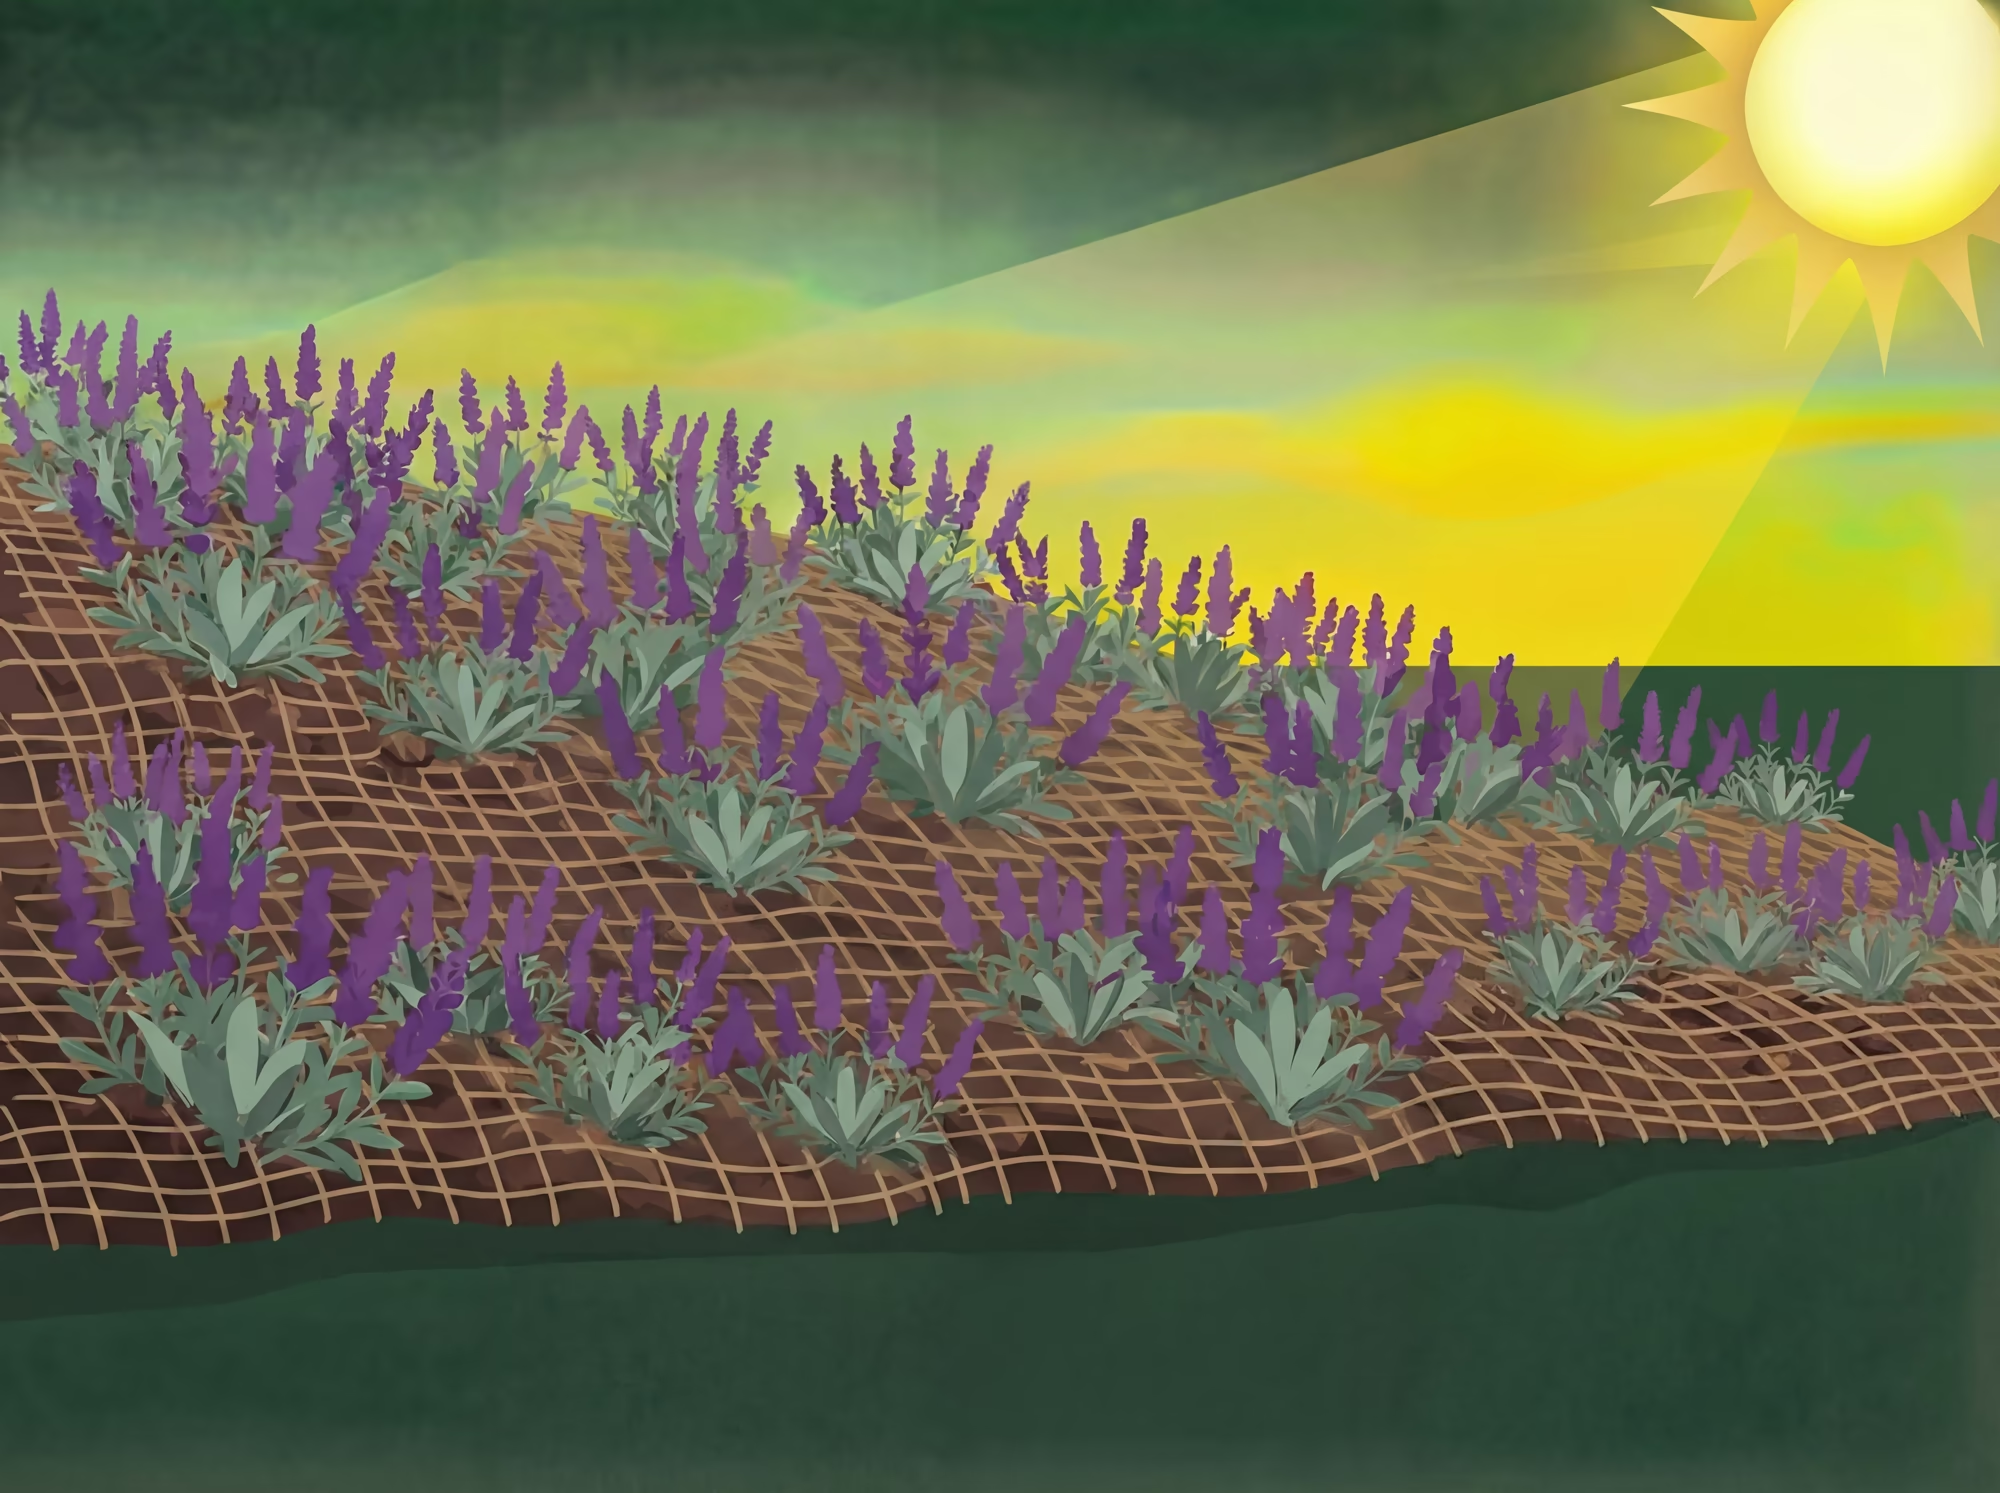
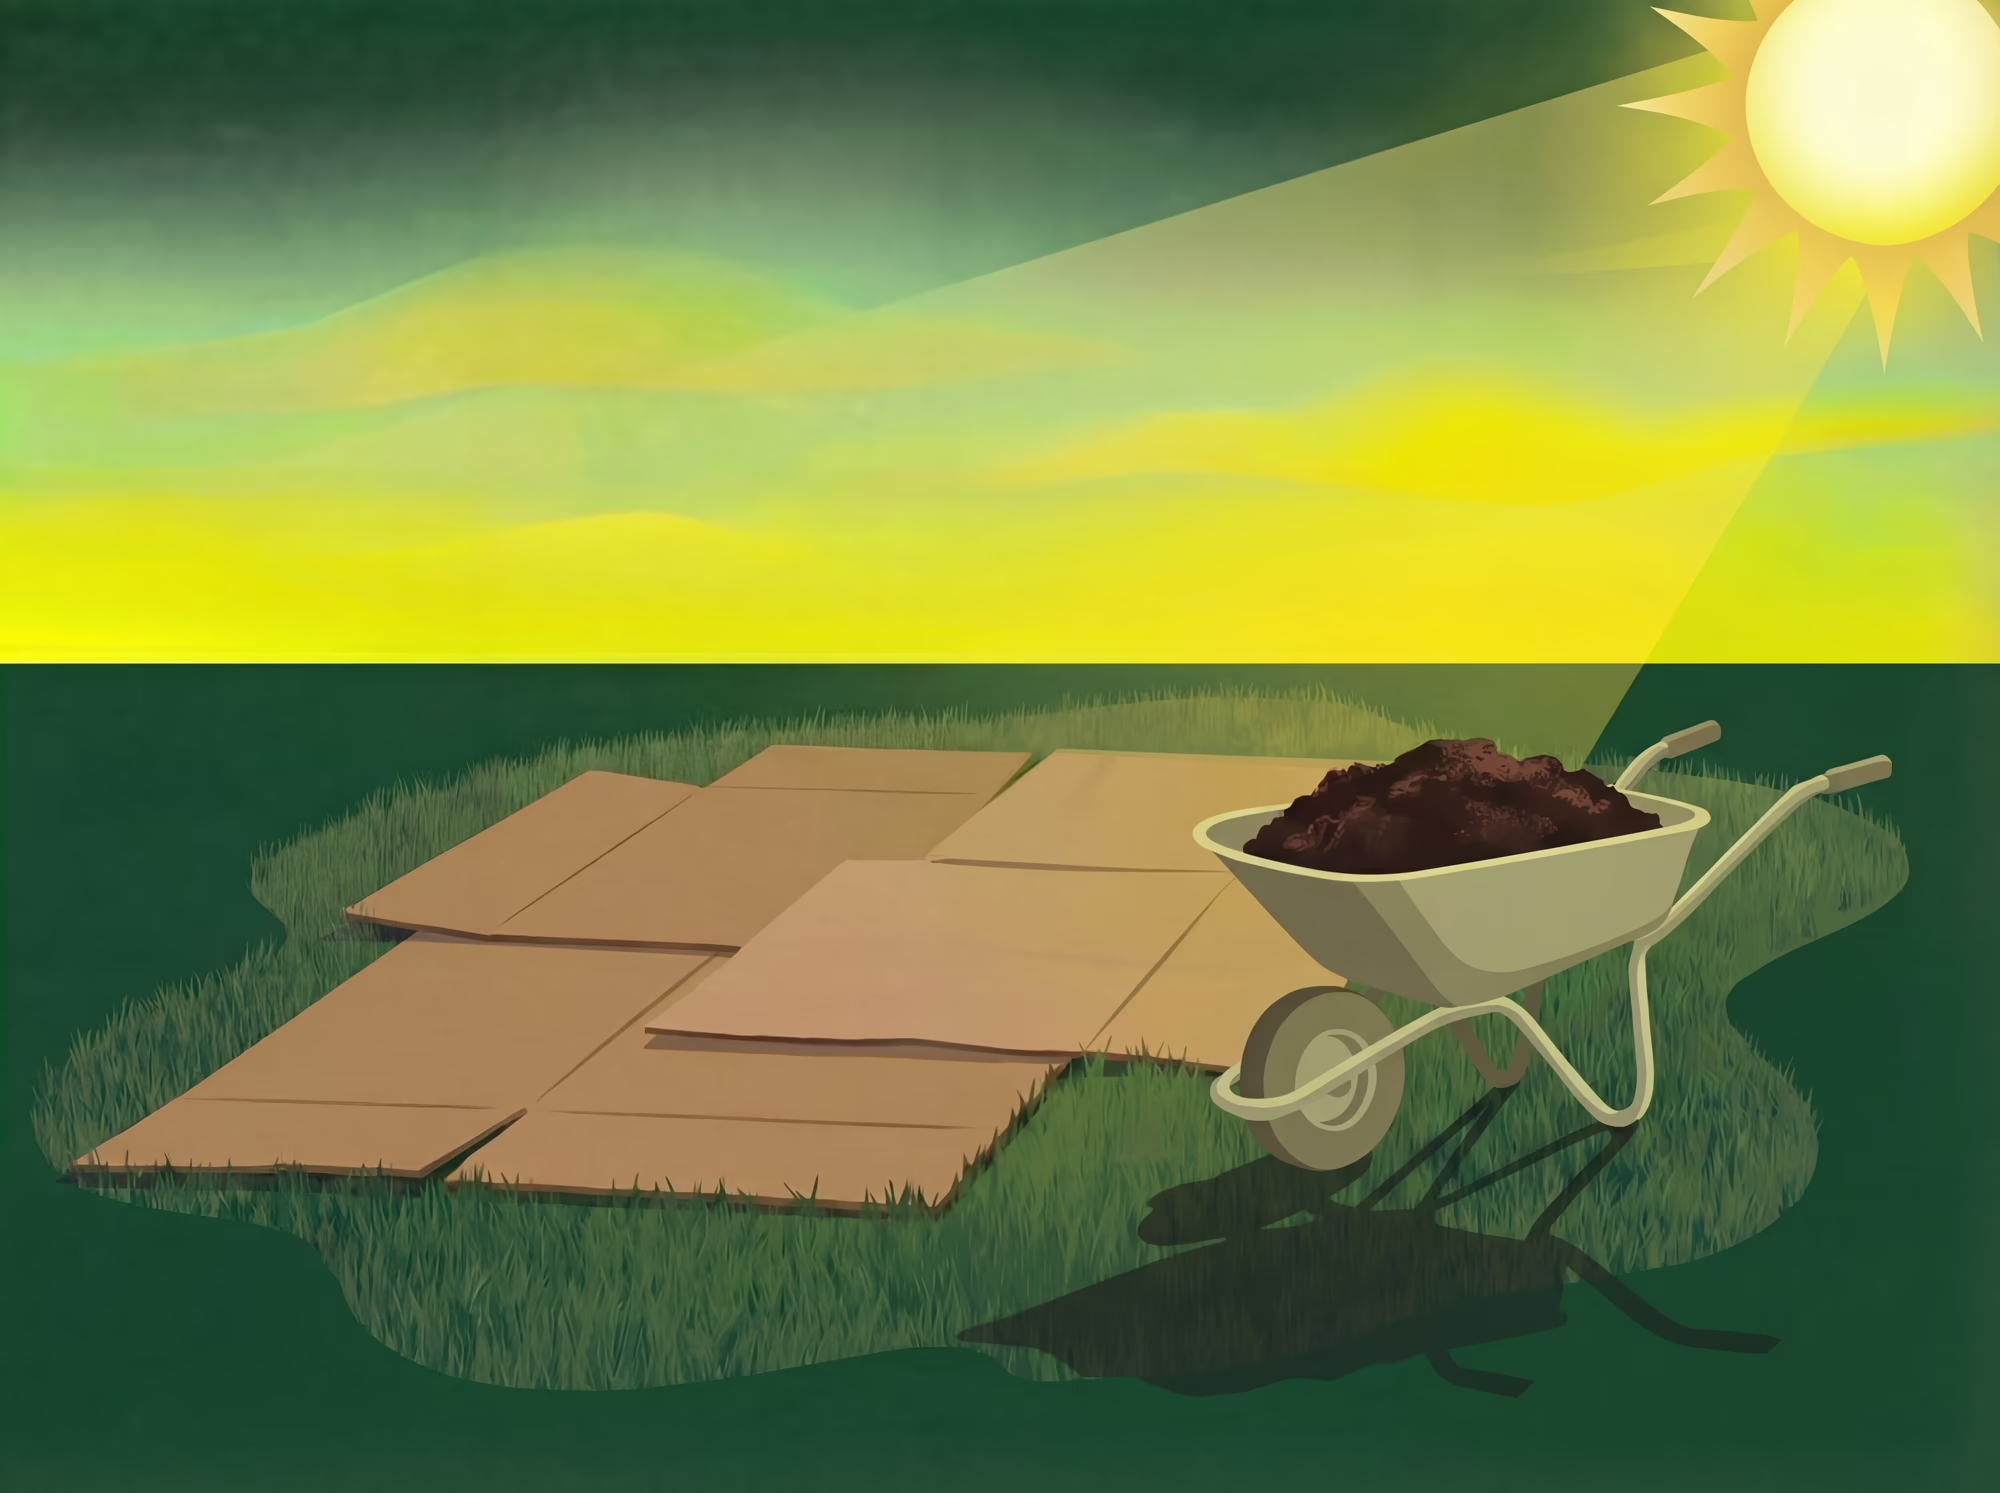
If bermuda grass grows in your yard, lay a sheet of cardboard over the hardware cloth before filling with soil. Bermuda grass sends runners that will grow up through mesh and invade your bed from below. Cardboard blocks it long enough for the new soil ecosystem to establish, then breaks down naturally over the first season.
Budget Breakdown
| Item | Estimated Cost |
|---|---|
| (6) 2x6x8-foot cedar boards | $90 to $180 |
| (1) 4x4x8-foot cedar post | $15 to $25 |
| Deck screws (1 lb) | $8 to $12 |
| Hardware cloth (optional) | $15 to $25 |
| Total frame | $115 to $240 |
| Soil mix (see next section) | $80 to $200 |
| Total project | $195 to $440 |
Budget alternative: Using cedar fence pickets brings the frame to $30 to $60, dropping the total project cost to $110 to $260.
What Goes Inside? The Perfect Soil Mix
The soil you put in your bed matters more than the frame around it. This is where raised beds earn their reputation: you are creating a growing medium from scratch, optimized for drainage, nutrients, and root growth. Get this right and everything you plant will thank you. Get it wrong and even the best-built frame will underperform.
"A healthy soil needs minerals (dirt), water, air and organic matter — the byproducts of decaying plant materials and the living organisms that come with it — to provide all the healthy things plants need to grow. If any one of these components is lacking, your plants won't thrive."
Joanne Crawford-Duner, Master Gardener, University of California Cooperative Extension Master Gardeners of Orange County
The simplest proven formula is a blend of three components in roughly equal parts: The Classic Triple Mix: 1/3 quality topsoil (provides mineral structure and weight) 1/3 compost (feeds plants and soil biology) 1/3 aeration amendment: peat moss, coco coir, perlite, or aged bark (prevents compaction, improves drainage)
This formula appears across university extension programs, professional growers, and experienced garden educators because it balances structure, nutrition, and drainage in a single mix. It is not the only option, but it is a reliable starting point.
EXPERT TIP
For an even simpler approach, a 50/50 blend of topsoil and quality compost works well for most vegetables and is the most cost-effective formula when buying in bulk. The key principle across every formula is this: incorporate multiple types of compost from different sources, since each releases different nutrients over time. A mix of mushroom compost, yard waste compost, and worm castings creates a richer, more balanced growing medium than any single compost source.
How Much Soil Do You Need?
| Bed Size | 6 Inches Deep | 12 Inches Deep | 18 Inches Deep |
|---|---|---|---|
| 4x4 feet | 8 cu ft (0.3 cu yd) | 16 cu ft (0.6 cu yd) | 24 cu ft (0.9 cu yd) |
| 4x8 feet | 16 cu ft (0.6 cu yd) | 32 cu ft (1.2 cu yd) | 48 cu ft (1.8 cu yd) |
| 4x12 feet | 24 cu ft (0.9 cu yd) | 48 cu ft (1.8 cu yd) | 72 cu ft (2.7 cu yd) |
A standard 4x8 bed at 12 inches deep needs approximately 32 cubic feet (1.2 cubic yards) of soil mix. Once you need more than 1 cubic yard, bulk delivery is almost always cheaper than bagged soil. A single 4x8 bed sits right at that threshold. Cost to fill a 4x8x12-inch bed: Bagged soil from a home improvement store: $200 to $450 (most expensive option) Bulk delivery (topsoil + compost blend): $80 to $200 including delivery Budget approach: Use a hugelkultur or lasagna base layer to reduce purchased soil by 30 to 50 percent
Layering Methods for Deep Beds
If your bed is 18 inches or deeper, you do not need to fill the entire depth with premium soil mix. Layering organic materials at the bottom saves money and creates a self-improving ecosystem beneath your plants. Hugelkultur base (for beds 18 inches or deeper): Bottom 40 percent: logs, large branches, untreated wood scraps (moisture reservoir) Next layer: sticks, twigs, smaller branches (aeration) Next: leaves, grass clippings, plant debris (nitrogen source) Compost layer (nutrient bridge) Top 12 inches minimum: your soil mix (immediate growing medium)
The decomposing wood stores moisture, releases nutrients slowly over years, and reduces the volume of purchased soil. Plan to top off annually with an inch or two of compost as the organic layers settle.
Where to Source Soil in Orange County
Serrano Creek Soil Amendments (Lake Forest): Wholesale pricing available to the public. Delivers throughout Orange County. Compost, topsoil, amendments. Orange County Farm Supply (Orange): Locally owned for over 65 years. Organic fertilizers, soil amendments, compost. 1826 W Chapman Ave, Orange CA 92868. Home Depot / Lowes: Bagged options for smaller quantities. Most convenient but most expensive per cubic foot. OC landfill locations: Some Orange County landfills offer free compost to residents. Call ahead to confirm availability.
What Should You Plant in Your First Raised Bed?
Southern California is one of the best places in the country for raised bed gardening, and the reason is simple: you can grow something in every month of the year. While gardeners in colder climates pack up their tools by October, Orange County sits in USDA hardiness zones 9b to 10b with over 270 frost-free days annually. That means two full growing seasons (warm and cool) with overlap months where both warm-season holdovers and cool-season newcomers share the bed.
Seasonal Planting Calendar for Zones 9b to 10b
| Season | What to Plant | What to Harvest |
|---|---|---|
| Cool (Oct to Feb) | Lettuce, kale, spinach, broccoli, peas, carrots, beets, radishes, onions, garlic, cilantro, dill | Late tomatoes, peppers, basil, figs, herbs (year-round) |
| Warm (Mar to Sep) | Tomatoes, peppers, squash, cucumbers, beans, basil, melons, corn, eggplant | Strawberries, peas, cool-season greens, herbs |
| Year-Round | Rosemary, thyme, oregano, sage, mint, chives, green onions, lettuce (with shade cloth in summer) | Herbs, green onions, strawberries |
Best Crops for First-Time Raised Bed Gardeners
Cherry tomatoes: Nearly foolproof in Southern California's long season. One plant can produce 10 to 15 pounds of fruit. Plant transplants in March or April. Herbs (basil, rosemary, thyme): Almost impossible to fail here. Rosemary and thyme are perennial and grow year-round. Basil is annual but thrives from spring through fall. Lettuce and salad greens: Ready to harvest in 30 to 45 days. Plant in fall and winter for the best results. Use shade cloth for summer growing. Peppers: Bell peppers and jalapenos love our heat. Plant transplants from March through May. Zucchini: Extremely productive. One plant can feed a family. Allow 4 square feet per plant. Radishes: The fastest crop in the garden (25 to 30 days from seed to harvest). Perfect for impatient gardeners and kids. Strawberries: Perennial in our climate. Plant everbearing varieties in October for spring fruit that keeps producing for months. Green beans: Easy from seed, no support needed for bush varieties, and ready in about 60 days.
That kind of year-round productivity is what makes your Yardtopia more than a garden. It is an outdoor pantry that restocks itself with every passing season.
EXPERT TIP
Fall is the single best planting season in Southern California. Trees, shrubs, and perennial herbs planted between September and November benefit from cooler temperatures and winter rains to develop strong root systems before summer. For raised beds, fall is ideal for cool-season crops and for establishing herbs that will produce year-round. Starting a bed in October gives you an immediate harvest of greens and herbs while your permanent plantings settle in.
Companion Planting Basics
A 4x8 bed is the perfect size for strategic plant pairings. Place herbs and flowers in the corners for natural pest protection, and tuck shorter crops beneath taller ones for built-in shade. Tomatoes + basil: Basil reduces tomato pests and attracts pollinators. Plant basil around the base of tomato plants. Peppers + rosemary or oregano: Strong-scented herbs repel aphids and spider mites. Lettuce + tomatoes or peppers: Lettuce thrives in the afternoon shade that taller crops provide, especially in summer. Marigolds around the perimeter: Deter nematodes and whiteflies. A border of marigolds doubles as pest control and pollinator support.
How Do You Water a Raised Bed Efficiently?
Raised beds dry out faster than in-ground gardens because soil is exposed to air on all sides. In Southern California's dry, warm climate, an efficient watering strategy is not a nice-to-have. It is the difference between thriving plants and stressed ones.
"A lot of clients don't realize how important irrigation is. If you're putting in plants, it's critical to have a good irrigation system to deliver the appropriate amount of water for the survival of the plants."
Farah Saquib, Partner, Urban Ecology Studio
Drip irrigation is the recommended approach. A simple drip system delivers water directly to the root zone, reducing evaporation by 30 to 50 percent compared to overhead watering. Complete raised bed drip kits from Rain Bird, DripWorks, and other brands cost $25 to $50 and include tubing, connectors, emitters, and a timer attachment. Installation takes less than an hour. Basic drip setup for a 4x8 bed: Connect to your outdoor faucet with a backflow preventer, pressure regulator (25 PSI), and filter. Run 1/2-inch mainline tubing to the bed. Lay 1/4-inch distribution lines or drip tape across the bed, spaced 6 to 12 inches apart. Connect to a battery-powered timer ($20 to $40) for automated watering. Cover the drip lines with 2 to 3 inches of mulch.
Watering Schedule for Southern California
| Season | Frequency | Duration (drip) | Notes |
|---|---|---|---|
| Summer (Jun to Sep) | Every 2 to 3 days | 30 to 45 minutes | Raised beds dry quickly in heat; check soil moisture regularly |
| Spring / Fall | 1 to 2 times per week | 20 to 30 minutes | Reduce as temperatures drop |
| Winter | Once per week or less | 15 to 20 minutes | Rainfall may provide enough moisture for cool-season crops |
The finger test: Push your finger 1 to 2 inches into the soil. If it feels dry at that depth, it is time to water. If it still feels moist, wait a day. Water in the early morning (before 10 a.m.) to minimize evaporation and give foliage time to dry before evening.
GOOD TO KNOW
Mulching is essential for raised beds in Southern California. A 2 to 3-inch layer of organic mulch (straw, aged wood chips, or shredded leaves) on the soil surface reduces evaporation by up to 70 percent. In practical terms, that means watering twice a week instead of daily during summer. Straw is the most popular choice for vegetable beds: it is affordable ($8 to $15 per bale), breaks down within one season to enrich the soil, and keeps roots cool on the hottest days. Keep mulch pulled a few inches away from plant stems to prevent moisture-related disease.
Explore drip irrigation options, watering guides, and current rebate information at Yardtopia.com. Irvine Ranch Water District offers a $90 rebate on eligible drip irrigation kits, plus rebates for smart irrigation controllers that automate your watering schedule based on weather conditions.
What Are the Most Common Raised Bed Mistakes to Avoid?
Even experienced gardeners make avoidable errors with raised beds. Knowing what trips people up saves you time, money, and frustration in your first season. Building too wide. If you cannot reach the center from either side without stepping on the soil, the bed is too wide. Four feet is the maximum for beds accessible from both sides. Against a wall or fence, keep it to 2 to 3 feet. Stepping on raised bed soil compacts it, which defeats the drainage and root-growth advantages you built the bed to achieve. Filling with the wrong soil. This is the number one frustration new raised bed gardeners report. Using only bagged topsoil (often mostly ground bark), only compost (too rich, holds too much water), or scooping clay from your yard (defeats the entire purpose) all lead to poor results. The 1/3 topsoil, 1/3 compost, 1/3 amendments formula works because it balances structure, nutrition, and drainage. Mixing compost from multiple sources (mushroom, yard waste, worm castings) provides a broader range of nutrients than any single type. Buying bagged soil instead of bulk. A single 4x8 bed at 12 inches deep needs roughly 32 cubic feet of soil. Filling that with bags from a home improvement store costs $200 to $450. The same volume delivered in bulk from a landscape supplier runs $80 to $200 including delivery. Bulk saves 60 to 80 percent and typically provides a higher-quality blend. Skipping the gopher barrier. In Southern California, this is not optional. Gophers can destroy an entire bed of root vegetables in a matter of days. Hardware cloth (1/2-inch mesh) stapled to the bottom of the frame costs $15 to $25 and lasts for the life of the bed. Forgetting to plan irrigation before building. Deciding where your water will come from after the bed is filled with several hundred pounds of soil limits your options. Plan your drip layout during the design phase, and place beds within reasonable reach of your outdoor spigot or irrigation mainline.
GOOD TO KNOW
Soil settles 2 to 3 inches during the first growing season as organic material compresses and decomposes. Fill your bed slightly above the top edge and plan to add an inch or two of fresh compost at the start of each new season. This is normal and not a sign that something went wrong.
Frequently Asked Questions About Raised Garden Beds
How deep should a raised garden bed be?
Twelve inches is the recommended starting depth for most vegetables. This provides enough room for tomatoes, peppers, beans, squash, and most common garden crops. Lettuce, herbs, and radishes grow well in beds as shallow as 6 to 8 inches. For deep-rooted crops like carrots and potatoes, 18 inches gives roots the space they need.
What is the best material for a raised garden bed?
Cedar and redwood are the most popular choices for their natural rot resistance, 10 to 20-year lifespan, and warm appearance. For Southern California builders, redwood is often the better value because it is locally available and lasts longer. Corrugated metal offers the longest lifespan (20 to 50 years) with a modern look. Concrete block is the cheapest option at $50 to $100 for a 4x8 bed. The "best" material depends on your budget, timeline, and design preferences.
How much does it cost to build a raised garden bed?
A DIY 4x8 cedar bed costs $115 to $240 for the frame, plus $80 to $200 for soil. Total project cost ranges from $195 to $440 for a standard build, or as low as $110 to $260 using budget-friendly cedar fence pickets. Pre-made kits range from $150 to $400 before soil.
What is the best soil mix for a raised garden bed?
A reliable starting formula is equal parts quality topsoil, compost, and an aeration amendment (peat moss, coco coir, or perlite). For a simpler approach, a 50/50 blend of topsoil and compost works well for most vegetables. The key is avoiding garden soil alone (too compacted), potting mix alone (too expensive and too light), or fill dirt (no nutrients). Quality compost from multiple sources provides the broadest range of nutrients.
What do you put in the bottom of a raised garden bed?
For beds placed on soil in Southern California, start with 1/2-inch hardware cloth stapled to the bottom of the frame. This is essential for keeping gophers out. Add a layer of cardboard on top of the mesh to suppress weeds and bermuda grass. For deep beds (18 inches or more), a hugelkultur base of logs, branches, and organic matter reduces the volume of soil you need to purchase and creates a long-term nutrient and moisture reservoir.
Should I line my raised garden bed with plastic?
No. Plastic on the bottom prevents drainage and creates conditions for root rot. If you need a barrier, use hardware cloth (for pests) and cardboard (for weeds). Landscape fabric on the interior sides of a wood frame is optional and can help extend the wood's lifespan, but it is not necessary with naturally rot-resistant lumber like cedar or redwood.
Do raised garden beds need drainage holes?
Raised beds with open bottoms (no liner) drain naturally through the soil and out the base. No drainage holes are needed. If you are placing a bed on concrete or a patio, elevate the frame 1/4 to 1/2 inch on rot-resistant shims so water can flow out freely. Line the bottom with landscape fabric to hold the soil while allowing water to pass through.
Is it cheaper to buy or build a raised garden bed?
Building is typically 40 to 60 percent cheaper than buying a pre-made kit of the same size. A DIY 4x8 cedar bed costs roughly $100 to $200 for the frame versus $150 to $400 for comparable kits. The tradeoff is time and tools: a kit assembles in 30 to 60 minutes with minimal tools, while a DIY build requires a saw, drill, and 2 to 3 hours.
Can you put a raised garden bed on concrete or a patio?
Yes. Raise the bed slightly off the surface using rot-resistant shims or blocks so water drains freely. Line the bottom with landscape fabric to retain soil. Plan for a minimum depth of 12 inches (18 inches preferred) since roots cannot grow into native soil below. Be aware that beds on concrete dry out faster and may need more frequent watering.
How long do raised garden beds last?
Lifespan depends entirely on material. Cedar lasts 10 to 15 years, redwood 15 to 20, corrugated metal 20 to 50, composite lumber 25 to 50, and concrete block is essentially permanent. None of these materials require chemical treatment or regular maintenance. The soil inside the bed improves every year as you add compost, which means your garden gets better with age even as the frame eventually weathers.
How much soil do I need for a 4x8 raised bed?
At 12 inches deep: approximately 32 cubic feet (1.2 cubic yards). At 18 inches deep: approximately 48 cubic feet (1.8 cubic yards). Once you need more than 1 cubic yard (27 cubic feet), bulk delivery is usually more affordable than bagged soil. A 4x8 bed at 12 inches sits right at that threshold.
Can you use pressure-treated wood for a raised garden bed?
Modern pressure-treated wood (ACQ, copper azole) does not contain arsenic. Research from Oregon State University found no detectable increase in copper concentration in vegetables grown in treated-wood beds over three growing seasons. However, it is not approved for organic growing. For edible gardens, cedar, redwood, metal, or concrete are the preferred choices. If you do use pressure-treated lumber, lining the interior with heavy plastic sheeting provides an extra layer of separation.
The Bottom Line
Build a 4x8 cedar bed this weekend ($100 to $300 in materials, one afternoon of work) Fill it with a quality soil mix (equal parts topsoil, compost, and aeration amendment) Plant what grows easiest in your first season: cherry tomatoes and basil in spring, lettuce and herbs in fall Set up a simple drip system and mulch the surface to cut your watering in half